
Top Drip Irrigation Systems for Vegetable Gardens
Jul 27th 2026
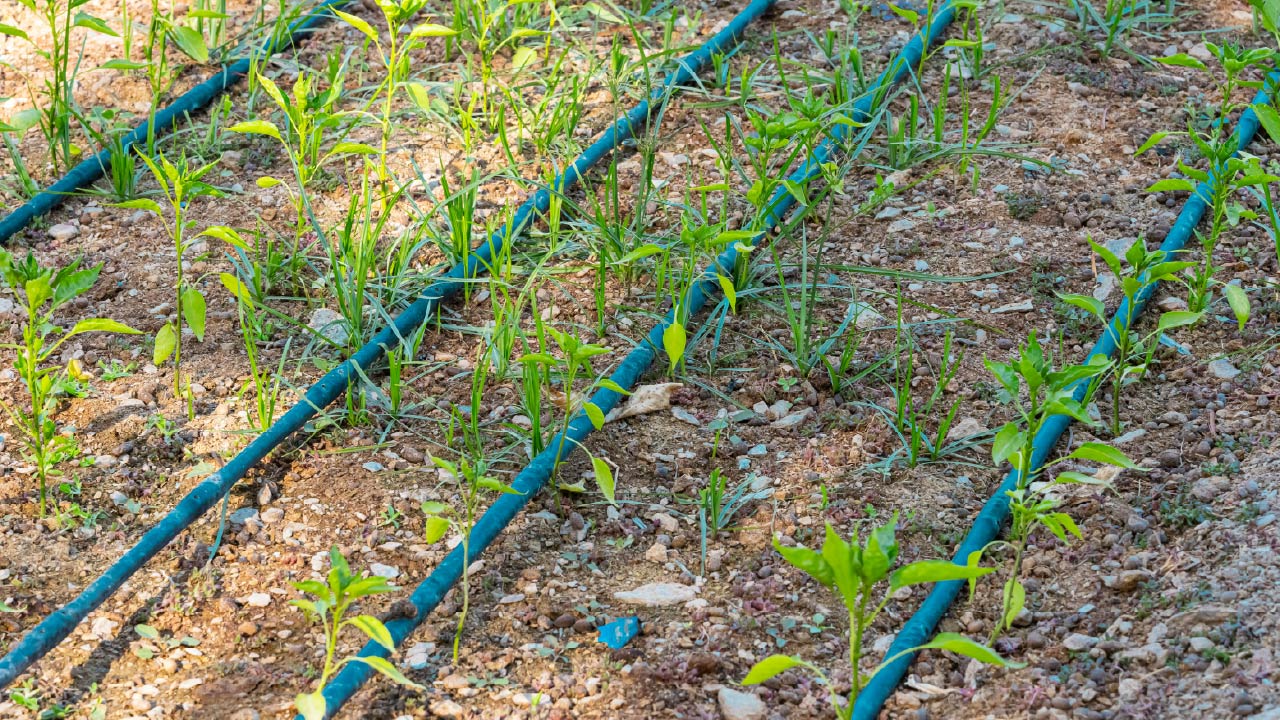
If you want to garden more sustainably, conserve water, protect the environment, and improve your plants' health with one easy, inexpensive change, switch to water-efficient garden drip irrigation. This targeted watering method transforms how vegetables absorb moisture, promotes deep rooting systems, suppresses weed seeds from germinating, and reduces outdoor water usage by up to 50% to 70%. But choosing the right drip systems for your specific vegetable garden layout matters. A raised bed full of leafy herbs has completely different watering needs than a row of sprawling squash or container tomatoes on a patio.
This article explores the top drip irrigation systems for vegetable gardens and helps you choose the best drip system for your crops. By the end of the article, you'll know exactly which product fits which part of your garden and how to set it up.
Why Vegetable Gardens Benefit So Much from Drip Irrigation
Before exploring specific products, you should first know why vegetables respond so well to drip watering. Whether you grow a modest urban backyard, an elevated raised bed garden, or large multi-row crop plots, drip irrigation delivers the unique watering to every vegetable environment and offers multiple benefits.
- Disease Reduction: Fungal diseases thrive in high humidity and damp leaf conditions. Consistent soil moisture via drip irrigation reduces water problems like blossom-end rot in tomatoes. Water goes straight to the roots, not the leaves, which means less powdery mildew, less blight, and fewer fungal issues overall.
- Targeted Root Zone Hydration: Instead of throwing water on foliage and surrounding pathways, drip systems deliver water to roots where they absorb nutrients.
- Less Weeds: Drip irrigation targets specific zones instead of soaking the whole bed, so weeds get less water. The space between rows stays drier, so fewer weed seeds germinate.
- Water Conservation: Overhead watering loses up to 40% of water to wind drift and evaporation. Drip systems operate at near 90–95% efficiency. You save 30 to 50% water compared to sprinklers because there's no overspray, no evaporation loss, and no runoff.
- Low-maintenance: A drip system is low-maintenance once installed. Attach an irrigation controller, and your garden will water itself automatically, even when you're away.
- Automation and Time Savings: Paired with an automated timer, your garden gets watered on schedule even while you are on vacation or at work. This saves you time and frees you from worrying about watering your garden at the right time.
How to Save Water in a Vegetable Garden: Easy Tips
Top Drip Irrigation Systems for Vegetable Gardens
Different vegetables have different root depths and water demands. Selecting the right drip system is essential to ensure your garden gets ideal moisture without overwatering or underwatering.
1/4" Soaker Dripline
Best for: Raised vegetable garden beds, patio containers, herb gardens, window boxes, pots, and dense plantings of carrots, radishes, greens, and bush beans.
If you're growing veggies in metal raised beds or containers, 1/4" soaker dripline is one of the easiest ways to get started with drip irrigation. 1/4" Soaker Dripline is a flexible, small-diameter micro-tubing with emitters spaced evenly along its length at 6-inch or 12-inch intervals. It connects directly to 1/2" main supply tubing using simple barbed fittings.
This small drip tubing releases water slowly along its entire length and soaks the soil evenly rather than delivering water from single point-source emitters.
Key features:
- Flexible 1/4" tubing that is easy to snake through tight raised bed spacing or wind around container plantings.
- Low flow rate is designed for slow, deep soil watering without runoff.
- Ideal for flat or gently sloped beds.
- Best for small growing spaces where efficiency matters more than covering large areas.
How to Water Your Garden with Soaker Dripline
- Run the 1/4" soaker dripline across the length of your bed, spaced 6 to 8 inches apart.
- Secure it in place with tubing stakes so it doesn't shift when you're planting or weeding.
- Run the system in short, frequent intervals to create a continuous moist topsoil without washing away light potting mixes.
- For containers, coil the soaker line around the inside perimeter of the pot, a few inches in from the edge. Water should reach the root ball rather than just soaking the outer edges of the soil.
1/2" Emitter Tubing
Best for: Medium to large, raised beds, garden rows, perennial vegetable plots, and medium-to-large crop spacing.
1/2" Emitter Tubing is a durable watering solution for permanent or seasonal vegetable beds. This tubing contains built-in pressure-compensating (PC) emitters spaced at 9", 12", or 18"regular intervals. PC emitters deliver consistent amounts of water directly into the soil only where needed, which minimizes water waste while promoting deep root growth.
Key features
- Larger 1/2" diameter, which handles higher flow volumes and longer row lengths without pressure loss.
- Pre-installed evenly spaced PC emitters provide uniform water delivery across long runs.
- Available in different emitter spacing to match plant spacing needs. Tighter spacing for closely planted crops and wider for larger vegetables.
- Durable UV-resistant construction to be used for row crops season after season.
- Handles both garden beds and long garden rows efficiently.
How to Water Your Vegetable Garden with Emitter Tubing
- Lay the tubing directly along your planting rows, with emitter spacing that matches your plant spacing. If you're planting tomatoes spaced 24 inches apart, emitter tubing with 12- or 18-inch emitter spacing is suitable to ensure every plant gets the ideal amount of water.
- Space parallel rows of 1/2" emitter tubing 12 to 18 inches apart down the length of your beds.
- For raised beds, run one or two lines down the length of the bed depending on bed width. A 4-foot-wide bed needs two parallel runs to cover the full root zone of plants on both sides.
- For established root systems, run your irrigation for 45 to 60 minutes two to three times a week. This promotes deep downward root growth rather than shallow surface roots
Drip Tape System
Best for: Long row crops, medium to large, raised garden beds, sweet corn, potatoes, onions, garlic, squash, melon patches, and large raised garden plots.
Aqua-Azul Drip Tape is an excellent choice for serious vegetable growers, gardeners, and anyone managing larger raised beds or extensive row crops. It is a thin-walled and flatter drip line with emitter slits spaced 8" to 12" apart, designed primarily for long, linear rows and commercial-style vegetable plots.
Drip tape is more affordable per foot and easier to lay out across large vegetable gardens. When unpressurized, it lays flat, and when the system is on, it expands to deliver low-flow, highly uniform watering along built-in emitters.
Key Features
- Flat lightweight tape design that's inexpensive per foot.
- Emitters spaced at even intervals for uniform watering along long rows.
- Low flow rate compared to emitter tubing, which is best to provide slow, deep watering over longer run times.
- Easy to lay flat along the soil surface or bury slightly under mulch.
- Used with a filter and pressure regulator to prevent clogging and tape damage.
How to Water Your Vegetable Garden with Drip Tape
- Lay drip tape flat along the base of your planting row before or right after seeding or transplanting.
- Cover it lightly with mulch or landscape fabric to reduce UV degradation, damage from foot traffic, and evaporation.
- Ensure the emitters face upward to prevent soil clogging.
- Drip Tape operates at low pressure, so always use a low-pressure regulator with this system.
- Run the drip tape system for 1 to 2 hours per session, depending on soil type and heat conditions.
Top Drip Tape Irrigation Brands for Your Farm and Garden
Shrubbler
Best for: Heavy feeding, thirsty plants requiring expansive root coverage like tomatoes, and bell peppers.
Some vegetable plants don't want a slow, even drip along a line instead, they need a generous, targeted watering right at the base of the plant. Shrubbler is built for it, and it's become a go-to watering solution for tomato and pepper growers specifically.
Shrubbler is a small, adjustable point-source emitter that produces a 360-degree radial umbrella pattern of water streams. The emitter attaches to your drip line via a thin feeder tube and delivers a broader, higher-volume flow than a standard drip emitter at the soil level rather than sprayed into the air. Shrubblers create an adjustable circular watering pattern around individual plants, making them perfect for vegetables with extensive root systems.
Tomatoes and peppers are spaced farther apart than leafy greens and are heavier feeders with deeper root systems, so they benefit from this individualized, higher-volume watering system.
Key features:
- Adjustable flow pattern and volume, so you can adapt exactly how much water each plant receives.
- Delivers water in a wider circular pattern around the base of the plant rather than a single drip point.
- Ideal for larger, heavy-feeding crops that need a lot of water.
- Reduces the risk of water pooling directly against the stem, which can contribute to root rot.
How to Water Your Vegetable Plants with Shrubblers
- Insert a Shrubbler on a stake directly next to each tomato. It is connected via 1/4" micro-tubing from the main supply line.
- Install one Shrubbler per plant and position it a few inches away from the main stem so water soaks into the surrounding root zone rather than sitting against the base.
- Water for 20 to 30 minutes 2–3 times per week to ensure deep soaking of the roots.
Junior Woodpecker Emitters
Best for: Individual widely spaced plants, potted vegetables, cucumbers on trellises, fruit trees.
Woodpecker emitter is one of the best drip systems for precision watering of individual, high-value plants like a single squash hill, a prized pepper plant, or specimen herbs. This is a pressure-compensating (PC) point-source drip emitter designed for extreme precision. It attaches directly into a 1/2" main poly line and delivers an even, regulated flow rate regardless of elevation changes or pressure fluctuations.
Key Features:
- Delivers water precisely to one exact spot and gives you complete control over which plants get water and how much.
- Compact, easy to hide under mulch.
- Perfect for irregular plant spacing where a straight line of emitters is not suitable.
- Useful for filling gaps in a larger system, like watering one extra transplant that doesn't fit along your main emitter tubing.
How to Water Your Vegetable Garden with Woodpecker Emitters
Junior Woodpecker emitters are best used for plants that don't fit neatly into rows, like a squash or melon hill planted off to the side, a single tomato in an odd corner of the bed, or specimen plants you want to monitor and water individually. They come in various flow (GPH) options, so they're also useful for mixed plantings where water needs vary significantly from plant to plant.
- Punch a Junior Woodpecker emitter into the main supply tubing and run 1/4" vinyl micro tubing directly into the base of the plant stem.
- Secure it with a tubing stake.
- Use 1 GPH emitters for medium plants and 2 GPH for large fruiting crops.
- Run the system for 30–45 minutes to supply precise moisture without over-saturating the surrounding soil.
Ein Dor Sprinkler
Best for: Herbs, grouped container plants, shallow-rooted leafy greens (such as lettuce, spinach, arugula, radishes, microgreens), and seedbeds during early germination.
The Ein Dor Micro-Sprinkler produces a soft, low-volume rain-like overhead misting pattern over a controlled area. Not every vegetable wants water delivered right at the base. This micro sprinkler is the best choice for shallow-rooted, densely planted crops like lettuce, spinach, arugula, and herbs that do better with a gentle, broader spray that mimics light rainfall across the whole growing area.
Unlike high-pressure lawn sprinklers, Ein Dor micro sprinklers deliver water in large droplets that resist wind drift and nourish plants without washing away seeds or seedbeds. This is perfect for watering crops planted in dense clusters or beds.
Key features:
- Produces a gentle, uniform spray, which suits shallow-rooted and closely spaced plants.
- Covers a circular area and reduces the number of emitters needed for tightly planted beds.
- Low water volume and pressure, less soil disturbance to delicate seedlings and shallow roots.
- Well-suited to water lettuce, spinach, arugula, and leafy herbs like basil, cilantro, and parsley.
- Can be elevated on a small riser stake to provide even coverage over taller plants.
How to Water Your Vegetable Garden with Ein Dor Sprinklers
- Place Ein Dor Sprinklers in the center of lettuce or herb blocks rather than along a row.
- Space them properly so their spray patterns slightly overlap for full, even coverage.
- Elevate Ein Dor sprinklers on stake assembly above the crop canopy, spaced 6 to 10 feet apart.
- Run short misting cycles, 10 to 15 minutes twice a day during germination and 20 minutes every morning for mature salad greens. This keeps the top 2 inches of soil consistently moist and cools tender leaves during scorching summer heat waves.
- Lettuce and many herbs have shallow root systems, so they benefit from this broader, gentler moisture pattern than from a single drip, as it can leave dry pockets between plants in a dense planting.
Can Ein Dor Sprinklers replace Drip Irrigation?
This is a great watering solution for gardeners who grow salad greens or herbs in blocks or grids rather than single rows. They are best used for seed germination and watering dense plantings like lettuce and herbs. Once seedlings mature, you can transition to drip irrigation for continued water savings.
Tips to Maximize Drip System Efficiency and Boost Vegetable Yields
Always use a pressure regulator: A drip system is designed to work for 15 to 30 PSI. Standard household water pressure is often much higher, which can blow out fittings or cause uneven flow.
Install a Filter: A filter prevents the fine sediment that causes emitter clogs, which is the number one cause of drip system failure.
Create Zones: Group plants with similar water needs in the same zone. Flow rates and run times differ between soaker lines, drip tape, and micro-sprinklers, so avoid mixing them on one valve to water everything correctly.
Add a Timer: Even a basic mechanical or digital hose-end timer will turn your drip system into a hands-off setup. An irrigation timer is especially valuable during hot summer stretches or vacations.
Flush your lines periodically: Open the end caps a few times a season and let water run through the lines to remove any buildup or sediment.
Inspect Emitters Regularly: Check drip emitters especially early in the season to make sure they are not clogged or damaged from winter storage or garden tools.
How to Improve a Drip Irrigation System with Easy Upgrades and Tips
The Bottom Line
Installing a high-efficiency drip irrigation system is the best investment you can make for your vegetable garden. Remember to match the right drip irrigation system to your vegetable garden, so you give every vegetable variety the exact growing conditions it craves.
The right irrigation system will save you hundreds of hours of manual hand watering and conserve thousands of gallons of water. Whether you're building your first vegetable garden or upgrading an existing irrigation garden system, always use high-quality components from reputable brands to make the difference.
DripWorks offers a complete selection of premium drip irrigation products from top-rated irrigation brands. With our high-quality drip irrigation kits or individual drip components, you can create an efficient watering system tailored to your garden, helping you grow healthier vegetables while saving water and time all season long.