Commercial Precision With Built-in Anti-Drain Technology
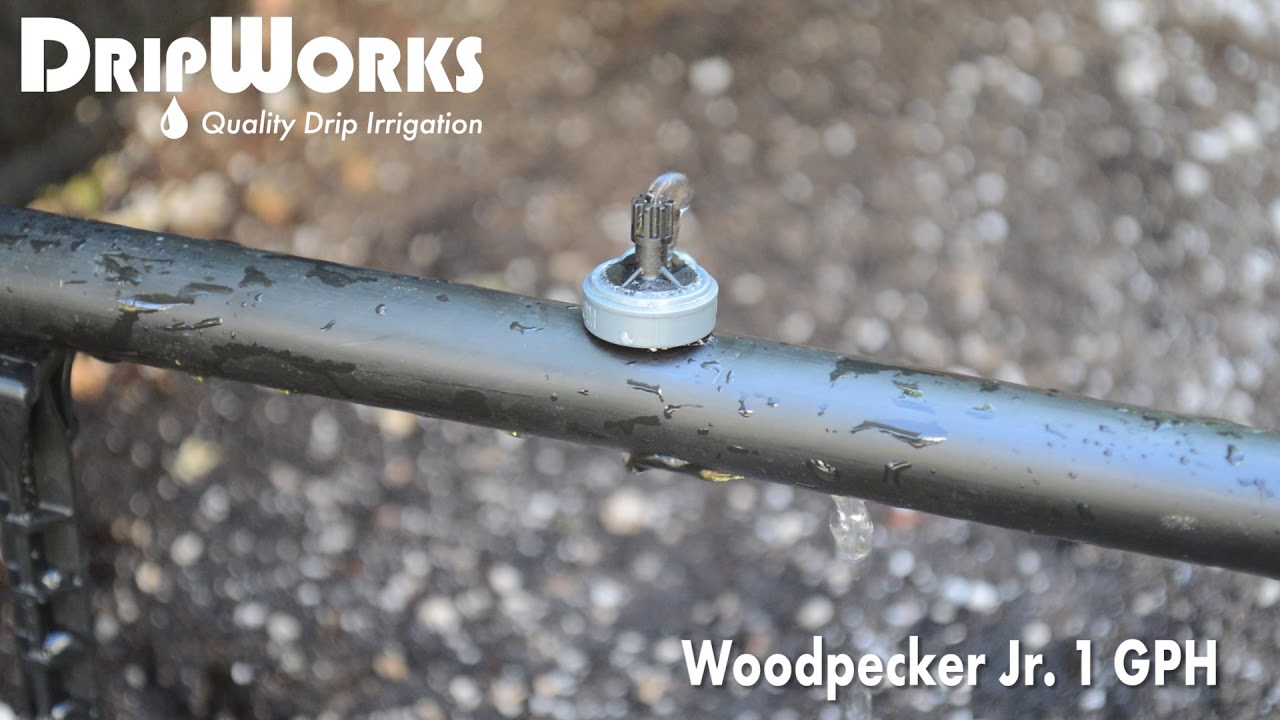
The Netafim Woodpecker Jr. Emitter takes the legendary reliability of the standard Woodpecker and upgrades it with a built-in check valve for ultimate system control. Perfect for commercial greenhouses, nurseries, and large residential landscapes, these pressure-compensating (PC) drippers are designed to solve the common problem of low-point drainage. When the irrigation cycle ends, standard lines drain out at the lowest elevation, over-watering those plants while under-watering plants at higher elevations. The Woodpecker Jr. eliminates this entirely.
Every emitter in the system features a non-draining check valve (CNL) that requires exactly 7 PSI to open and snaps shut when pressure drops to 1.7 PSI. This ensures that the entire line stays full of water between cycles and that every single emitter starts and stops watering at the exact same moment. Punched directly into 1/2" mainline tubing, this compact powerhouse delivers perfectly uniform pulses of water and nutrients, making it the premier choice for pulse-irrigation and precision commercial growing.
Why Choose the Woodpecker Jr. Emitter?
- Built-In Check Valve: Prevents low-point drainage by sealing shut at 1.7 PSI, ensuring the mainline stays full of water for instant startup on the next cycle.
- Simultaneous Operation: Because the line stays pressurized, every plant on the system receives water at the exact same time, eliminating dry spots.
- Continuous Self-Flushing: Features an extra-wide flow path that automatically clears debris during operation, drastically reducing the chance of clogging.
- Pressure Compensating: Maintains a uniform flow rate regardless of pressure fluctuations between 10.2 and 58 PSI.
- Compact Design: A smaller profile than the standard Woodpecker makes it ideal for tight spaces and intensive growing setups.
Technical Specifications
Detailed specifications for system planning.
| Specification |
Details |
| Product Type |
Pressure Compensating (PC) Non-Draining Emitter |
| Inlet Connection |
1/4" Barb |
| Outlet Connection |
1/4" Nipple |
| Operating Pressure Range |
10.2 to 58 PSI |
| Valve Opening Pressure |
7.0 PSI |
| Valve Closing Pressure |
1.7 PSI |
| Filtration Requirement |
120 Mesh Minimum Recommended |
How to Install: A Step-by-Step Guide
A quick guide to installing your Netafim Woodpecker Jr. emitters.
Step 1: Punch the Hole
Using a dedicated irrigation hole punch, create a clean hole directly into your 1/2" or 3/4" mainline tubing at the desired location.
Step 2: Insert the Emitter
Push the barbed inlet (the slightly narrower, pointed end) of the Woodpecker Jr. firmly into the punched hole until it snaps securely into place.
Step 3: Attach Micro Tubing (Optional)
If your plant is further away from the mainline, push a piece of 1/4" micro tubing onto the top outlet nipple to direct the water precisely to the base of the plant.
Frequently Asked Questions
What is the difference between the Woodpecker Jr. and the standard Woodpecker emitter?
The Woodpecker Jr. has a smaller profile and features a built-in check valve (CNL) that prevents the irrigation lines from draining when the system shuts off, whereas the standard Woodpecker does not.
This check valve makes the Woodpecker Jr. ideal for sloped terrain or commercial operations doing frequent "pulse" watering, as the line stays fully pressurized between cycles.
What pressure is required to operate the Woodpecker Jr. Emitter?
Your system must reach at least 7 PSI to push the internal check valve open and start water flow. The emitter then operates perfectly uniformly between 10.2 and 58 PSI.
Because of this higher opening pressure requirement, this emitter is not recommended for ultra-low pressure gravity-fed systems.
Can I use a standard shutoff cap with the Woodpecker Jr. Emitter?
While a standard shutoff cap can be pressed onto the outlet, the tether loop on the cap will not fit underneath the Woodpecker Jr. body because of its compact, low-profile design against the tubing.
If you decide to temporarily block an emitter, you will need to store the cap separately when not in use rather than leaving it tethered to the emitter base.
As I start my system this spring, why is the Woodpecker Jr. better for new transplants?
The non-draining check valve inside the Woodpecker Jr. ensures every emitter starts simultaneously. This prevents new, delicate spring transplants at the beginning of the line from being overwatered while waiting for the end of the line to pressurize.
Spring transplants require precise, even moisture to establish strong root systems. By keeping the mainline full of water, you deliver an exact, measured dose to every plant at once.
✔ Compatibility Check
Please note the requirements for this component:
- Minimum Pressure Required: Because of the internal check valve, your system must reach at least 7 PSI to open the emitters. Not suitable for gravity systems.
- Filtration is required: A minimum of a 120 mesh water filter is recommended to prolong the life of these commercial emitters.
- Hole Punch required: To install directly into 1/2" or 3/4" mainline, you must use an irrigation hole punch.
Complete Your System
Ensure your installation goes smoothly with these recommended products:
- 1/2" Mainline Tubing: The standard water delivery line that these emitters punch directly into.
- Pocket Punch: The essential tool for creating perfectly sized, clean holes in your mainline tubing.
- 1/4" Micro Tubing: Connect this to the emitter's outlet to direct water precisely to your plants.
- System Filters: Prevent clogging by installing a 120-mesh or 150-mesh filter at your water source.
Downloads
Relevant Tips & Guides