
The Easiest DIY Drip Irrigation Setup in 10 Simple Steps
May 26th 2026
Drip irrigation is a highly efficient and convenient method of watering your garden, landscape, and farm. When this precise system delivers water directly to your plants' roots, it minimizes water waste and helps conserve this precious resource. If you are still watering your plants by hand or wasting water and money with overhead irrigation that waters the leaves instead of the soil, it is time to upgrade your irrigation system. Between rising water costs, climate change, drought restrictions, and busy schedules, many gardeners and landscapers are looking for a watering solution that saves time without compromising plant health.
A drip irrigation system is the single most effective solution to save time, reduce water bills by up to 70%, and eliminate fungal leaf diseases. The best part? You do not need to hire an expensive contractor or dig up your lawn to install this system. You can set up the system in just 10 easy steps.
In this drip irrigation guide, we will show you how to install a successful drip irrigation system in just ten steps.
Why Drip Irrigation is Worth it
Drip irrigation delivers water under low pressure directly to the soil surface right at the plant's root zone. These smart systems operate at 90% to 95% efficiency, compared to just 50% to 70% for traditional sprinkler systems.
When you spray a garden with a hose or use an overhead sprinkler, much of the water never reaches the roots. Instead, it evaporates into the air, runs off the topsoil, or sits on plant foliage. The slow, focused water delivery via drip irrigation allows the soil to absorb moisture deeply without compaction. In addition, drip irrigation works for all types of plants and gardens, including raised beds, vegetable gardens, greenhouses, container gardens, orchards, deck gardens, and sloped landscapes.
Get Necessary Tools and Materials
Before you start installing your drip irrigation system, gather all the tools and materials you will need. One reason drip irrigation is beginner-friendly is the short component list. Here is a list of the essential items:
- Backflow preventer: Keeps irrigation water out of your drinking supply.
- Pressure regulator: Lowers spigot pressure to a safe level and prevents high household pressure from blowing fittings apart.
- Filter: Catches sediment, dirt, and prevents tiny emitter holes from clogging.
- 1/2-inch main tubing: The main tubing that carries water through your garden
- 1/4-inch drip tubing: Carries water from mainline to plant rows.
- Drip emitters: The small pieces that deliver the water to the plant base.
- Tubing stakes: Support tubing and secure it.
- Hole punch tool: Create clean holes in tubing.
- End cap fittings: Close the ends of drip tubing.
- Timer: Automates watering schedules.
Now, let's start the installation process in 10 simple steps to ensure your DIY project is a complete success.
Step 1: Plan Your Garden Layout
The first step is to plan the layout of your drip irrigation system. The easiest drip irrigation installation begins with a simple plan. Sketch your garden on paper, including all garden beds and raised beds. You don't need perfect drawings. A basic layout helps you determine how much tubing and how many emitters you'll need.
When creating the layout, consider these factors:
- Watering needs of each plant: Different types of plants have different water requirements. Grow plants with similar watering needs together in the same bed to ensure efficient irrigation. For example, vegetables may need more frequent watering, and drought-tolerant shrubs require less water. Additionally, raised beds and containers dry out faster than in-ground plants.
- Levels of sun or shade: Consider the sun exposure in your garden. Plants in full sunny locations will require more water than those in partial or full shade.
- Soil types: If your garden has different soil types, consider this when planning your layout. Some soil types hold water better than others, affecting plants' watering
Step 2: Connect the System to Your Water Source
Once you have planned your layout, it's time to connect a drip system to your water source. Every drip irrigation setup begins at an outdoor faucet or hose bib. Locate the nearest faucet or water spigot and attach a backflow preventer. A backflow preventer device keeps dirty water from flowing backward into your household's main water lines, preventing contamination.
Step 3: Add a Pressure Regulator and Filter
The next step is to connect a pressure regulator to the backflow prevention assembly. A pressure regulator helps maintain consistent water pressure throughout your system and prevents damage to the tubing and emitters from high pressure.
Most drip systems work best at low pressure (20-25 PSI). Adding a pressure regulator to your drip system will improve its efficiency and longevity. The primary benefit is preventing emitter damage, as high water pressure can cause wear and tear on system components.
Add a High-quality Filter
First, make sure your water is clear of dirt and debris that can clog the tubing and emitters. It will reduce the efficiency of your irrigation system. To prevent this, use a filter before the pressure regulator to capture excess sediment and other debris before they enter the tubing. A filter keeps dirt and debris from clogging emitters. Make sure to choose a good filter with a mesh size suitable for your water source.
Step 4: Lay Out the Main Tubing
When setting up a garden drip irrigation system, choose the right size tubing for your plants' needs. For most gardens, 1/2-inch tubing is a great choice because it balances water flow and pressure well.
Slowly roll the tubing, attach it to your faucet assembly, and run it along the length of your garden beds, behind shrubs, or right along the back edges of your raised beds based on your garden plan. Make sure to secure the tubing in place with hold-downs, stakes, or clamps to prevent it from shifting.
When installing the tubing, consider any obstacles or potential hazards in your garden, such as rocks or tree roots. Then adjust the tubing path to avoid these obstacles and ensure smooth flow.
Tubing Installation Tips
- Leave the tubing in the sun for 15-20 minutes before installation. Warm tubing becomes softer and easier to handle.
- Secure tubing with landscape stakes or hold-downs every few feet.
- Avoid placing tubing where lawn equipment or tree roots could damage it.
- Keep the tubing close to the plants but not directly against the stems.
If your garden has multiple beds, use tees, elbows, and couplers to navigate the corners.
Step 5: Install Drip Emitters or Dripline
Once the main drip tubing is in place, it's time to install the watering devices. You can choose from a variety of watering devices to attach to your drip system. Not all plants want to be watered the same way. Match the correct emitter type to your specific planting type for maximum plant health.
Individual Drip Emitters
Drippers provide a slow, steady drip of water to the base of each plant or a cluster of plants. Punch a hole directly into the main line and install an individual emitter right next to the base of that specific plant.
Staked bubblers offer extra versatility for larger areas or pots, letting you adjust the water flow from a slow drip to a stream.
Inline Emitter Tubing
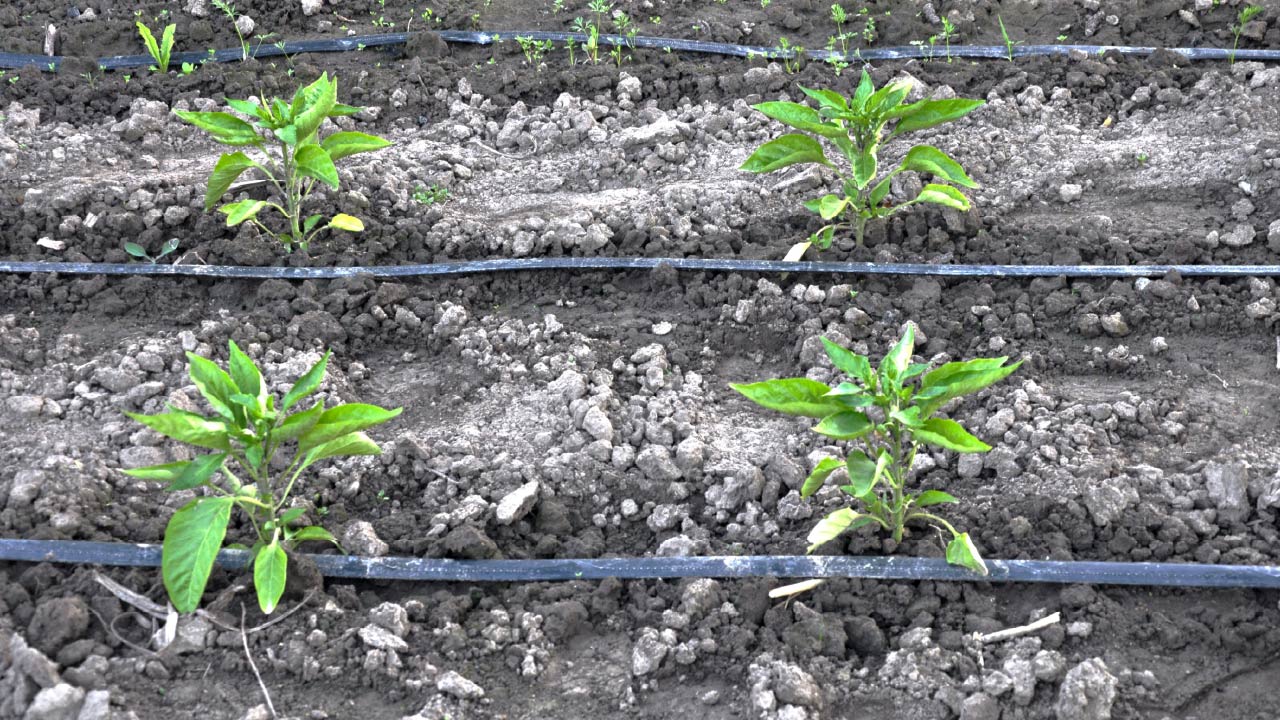
This is the absolute water-efficient solution for dense vegetable rows or raised beds. It looks like standard 1/2-inch tubing, but it features pre-installed, pressure-compensating emitters. You simply run this tubing up and down your planting rows in a uniform manner. It requires no hole punching.
Dripline
For long rows of plants, planters, or window boxes, consider using ¼ inch drip line tubing. With its built-in emitters spaced every 6, 9, or 12 inches, it can be placed end-to-end of the planter for even watering of all plants. Dripline works well for raised beds, flower beds, vegetable rows, and groundcovers.
How to Install Emitters
- Use a hole punch tool to create a hole in the main tubing.
- Insert barbed connectors into the hole.
- Attach 1/4-inch tubing if needed.
- Connect emitters at the plant base.
Tip: Select emitters with the appropriate flow rate for each plant's watering needs. Consider the soil type in your garden when determining emitter spacing. Sandy soil requires emitters to be spaced closer together, while clay soil requires wider spacing.
Step 6: Flush the System Before Use
Before closing the tubing and turning the system on, flush the lines to remove debris. As you cut tubing and punch holes, tiny pieces of dirt, PVC, and outdoor debris can fall into your clean tubes. These tiny particles inside the tubing can clog emitters if not removed early. So, flush the system fully before closing.
- Turn on the water slowly.
- Allow water to flow through the tubing for 30 to 60 seconds.
- Ensure the tubing is clean.
- Turn off the water.
Step 7: Cap the Tubing Ends
Now that the lines are fully flushed and debris-free, it is time to close the ends of the tubing so the system can build internal pressure and start dripping water efficiently. Close the open ends of the system with end cap fittings.
This step prevents water from flowing out uncontrollably. Pre-made end caps provide a cleaner appearance and are easy to remove for flushing again.
Step 8: Test Your Drip Irrigation Setup
Before covering the drip tubing, test your system to ensure it is functioning and distributing water properly. Turn on the water supply and inspect the emitters. Walk through the garden when the system operates.
All emitters should release a steady, slow drip of water. If there are any leaks or issues, make the necessary adjustments or repairs now. Also, make sure all connections are firm and secure.
Step 9: Add a Timer for Automation
If you want to take your drip irrigation system to the next level, add a best-quality timer to automate the system. Attach the timer directly to the outdoor faucet and automatically run the irrigation schedule.
A timer transforms a basic drip irrigation setup into an automated, advanced watering system. It will turn the water on and off at specific times, saving you time and reducing water waste. Simply set the timer to run when you want the plants watered and let the system handle the rest.
Benefits of Installing a Timer
- Saves time
- Reduces overwatering
- Maintains consistent soil moisture
- Great for vacations or busy schedules
Step 10: Cover or Mulch Tubing
Once you are satisfied with your drip irrigation system's performance, it's time to cover all your exposed tubing with a thick layer of organic mulch.
Covering the tubing protects it from damage. Mulch also helps conserve moisture and suppresses weed growth. It improves overall drip irrigation efficiency by reducing evaporation and regulating soil temperature.
The Best Drip Irrigation System: What to Consider Before You Buy
Tips to Maintain a Drip Irrigation System Regularly
One of the best things about drip irrigation is its low maintenance requirements. However, a little routine care will keep the system operating efficiently and extend the lifespan of your irrigation setup. Here are some practices to maintain a drip system.
Inspect Emitters: Check for clogs, wear, or weak water flow regularly across all your emitters.
Flush Lines: Flush the system at the start and end of the season. It is also good to open end cap fittings occasionally to remove sediment buildup.
Check for Leaks: Look for cracked tubing or loose fitting connections.
Clean the Filter: Rinse the filter mesh or replace it as needed.
Automate Seasonal Schedules: Don't set your timer once and forget it for the rest of the year. Plants need less water during cool, rainy spring and autumn weeks than they do during the heat of mid-July. Adjust the timer based on season, weather, and the plant's needs.
Adjust for Plant Growth: As plants mature, you may need to reposition emitters or dripline.
Winterize the System: In colder northern regions, drain all water from the tubing before freezing temperatures arrive, and insulate exposed components to prevent freezing damage.
The Bottom Line
Installing a drip irrigation system is a rewarding garden upgrade. With just a few easy steps, you can install a complete drip system to help keep your plants healthy and save you time and money in the long run. Give it a try, follow these steps to create a system in a single weekend, and see the difference it can make in your garden.
Once complete, you'll spend less time dragging hoses and more time enjoying healthier plants, lower water bills, and a thriving landscape. Your plants will thrive, and you can finally sit back and enjoy your beautiful garden. With a DripWorks drip irrigation system, you can ensure that each of your plants gets just the right amount of water.