
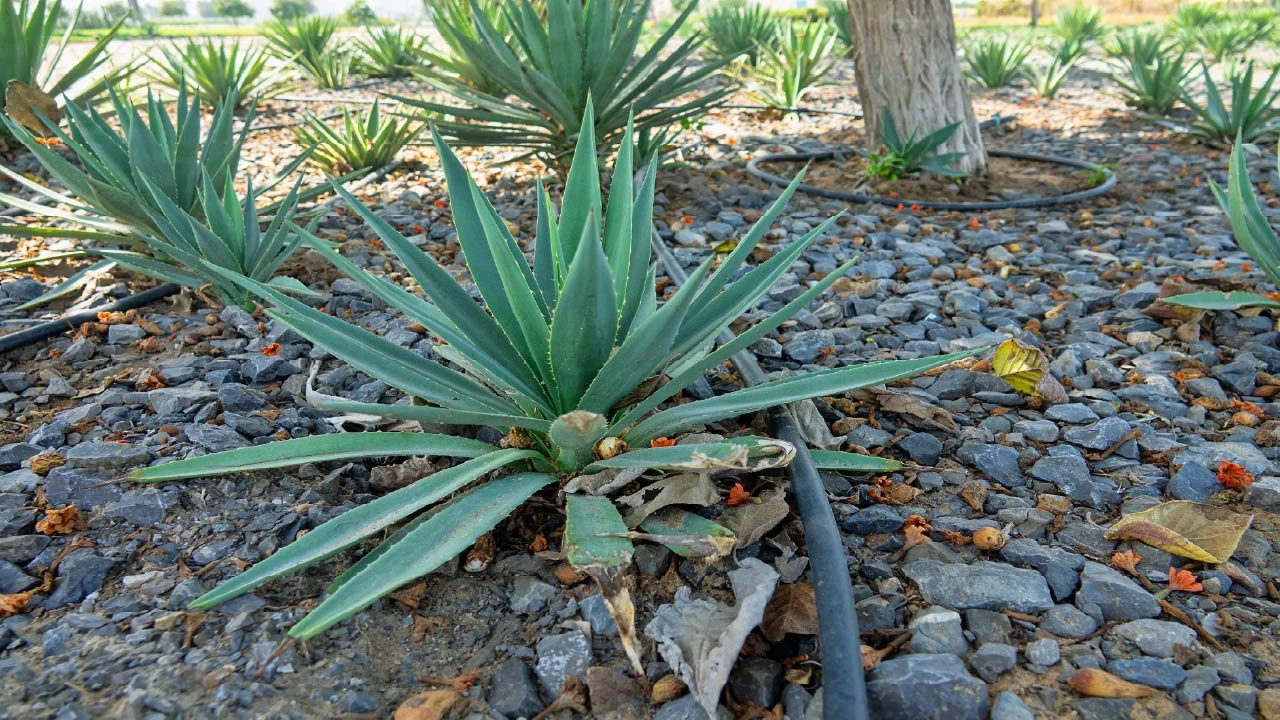
Design a Drip Irrigation System for Your Landscape
Sep 23rd 2026
Drip Irrigation has become the ideal solution in gardening, agriculture, and landscaping worldwide. Water is essential for plant health, but it must be applied properly. Traditional sprinklers waste water through evaporation, wind drift, and runoff by watering sidewalks and driveways instead of plant roots. With drip irrigation, it goes straight to the roots, reducing waste and encouraging healthy vegetation growth. No mist drifting onto driveways. No runoff pooling on the patio. It sounds simple until you see the difference in your water bill or watch a stressed hydrangea bloom again within a week.
That's why drip irrigation has become one of the smartest upgrades you can make to any landscape. The key is to design the system first before installing the tubing. Whether you're a homeowner trying to keep your landscape lush without wasting water or a professional landscaper designing systems for clients, this guide shows you how to properly design a drip irrigation system.
Why Choose Drip Irrigation for Your Landscape?
Landscape irrigation involves much more than handling a patch of lawn. A typical yard contains mature trees, shrubs, perennials, annual flowers, ornamental grasses, groundcovers, and containers, all with different watering needs.
Drip irrigation is a low-pressure, highly efficient watering method that gives you much more control over how water reaches every type of plant. It keeps the landscape beautiful while conserving water and reducing bills.
Before diving into the design process, it helps to understand why drip irrigation has become the standard for efficient landscape watering.
Here's what makes drip irrigation worth the investment:
High water savings: Drip systems can reduce water usage by 30-50% compared to traditional sprinklers. Water goes straight to the roots instead of evaporating in the air or running off pavement.
Healthier plants: Slow, consistent moisture at the root zone produces deeper root growth, reduces plant stress, and helps prevent overwatering diseases like root rot and fungal growth.
Weed reduction: Water isn't sprayed across the entire bed, so the soil between plants stays drier, which discourages weed germination.
Lower disease risk: With landscape drip irrigation, foliage stays dry, reducing the risk of powdery mildew, blight, and other moisture-related plant diseases.
Adaptable for Mixed Landscapes: Drip systems let you adjust water delivery to different plant types. You can create separate zones of succulents, shrubs, trees, and vegetable beds based on their unique watering needs.
Lower long-term costs: Initial Drip setup requires some investment, but the significant water savings and reduced plant loss will pay for the system within a couple of seasons.
Works Great with Slopes and Irregular Shapes: Unlike spray systems that struggle with runoff on slopes, drip emitters apply water slowly enough that it has time to absorb before it ever runs off. Drip tubing can follow the shape of the narrow, curved, or sloped planting area much more easily.
Can Be Automated: Connect the system to an irrigation timer or smart controller, and your landscape will receive water automatically on a schedule. This is super useful for homeowners who travel a lot or simply don't want to drag hoses around the yard every few days.
How to Design a Drip Irrigation System Step by Step
A successful landscape drip irrigation system starts with a plan. Don't start by buying a roll of tubing and randomly placing emitters around the yard. Instead, follow this design process.
Create a Map of Your Landscape
Start with a simple drawing of the area you want to irrigate. It doesn't need to be precise. Include:
- Property boundaries and hardscape such as patios, walkways, and driveways.
- Existing garden beds, trees, shrubs, groundcovers, and lawn areas.
- The location of your water source.
Why Mapping Matters
This map becomes your irrigation blueprint. The placement of every emitter, tubing run, and valve will be based on it, so make sure the layout is accurate before moving on to installation.
The map helps you determine how much tubing you need, where to run your mainline, how many zones you need, and where to install different emitter types. It also gives you a visual way to identify plants with similar watering requirements.
Divide the Landscape into Irrigation Zones
Zoning is one of the most important parts of drip irrigation system design. You don't want every plant in the landscape connected to one irrigation valve. Instead, group your plants into zones based on:
- Water needs: drought-tolerant plants, thirsty annuals, and vegetable gardens.
- Plant type and size: Trees need deep, infrequent watering and groundcovers need shallow, frequent watering.
- Sun exposure: South-facing beds dry out faster than shaded north-facing areas.
- Soil type: Sandy soil drains fast and needs more frequent watering, and clay soil holds water longer.
Calculate Your Water Needs and System Capacity
Before buying components, you need to know how much water your system can deliver. This depends on:
- Water pressure at your source (measured in PSI)
- Flow rate available (measured in gallons per minute, or GPM)
- Total emitter output needed across the system
Two measurements are especially important: Pressure and Flow rate
Water pressure is measured in PSI, while flow is measured in gallons per minute (GPM). Your system needs enough available flow rate to operate the zone without causing excessive pressure loss. If your water source provides limited flow, divide the landscape into smaller zones instead of running everything at once.
Don't Guess at Pressure
Use a pressure gauge to determine the static pressure at your irrigation connection. Remember, pressure at the water source isn't the same as pressure at the end of a long run of tubing. Friction, elevation changes, filters, valves, and fittings can all affect pressure.
If you're designing a drip system for a large landscape, consult a landscape irrigation specialist or use online drip irrigation calculators to size your zones accurately.
Choose the Right Components
This is where design decisions really matter.
Emitters: Match the emitter to the plant's water needs, soil type, and irrigation zone. You can choose from basic or pressure-compensating emitters, typically 0.5, 1, 2, or 4 GPH.
Pressure-compensating emitters are worth the extra cost on sloped landscapes or long runs because they deliver uniform water flow regardless of elevation changes.
Micro-sprayers or Misters: Best for groundcovers or densely planted beds where you need a wider water spread.
Drip Line or Inline Emitter Tubing: This tubing has pre-installed emitters evenly spaced along the tube. It is ideal for hedges, flower beds, groundcovers, vegetable rows, mass plantings, closely spaced shrubs, or continuous planting beds. A drip line creates uniform spacing without requiring you to install individual emitters at every plant.
Filters: A 150–200 mesh filter is standard to prevent clogging.
Pressure Regulators: Match the pressure regulator to your emitter type's required PSI (usually 20–30 PSI for standard drip components).
Backflow Preventers: Most states require this component to protect your potable water supply.
Tip: Always buy quality filters and pressure regulators even if you save money elsewhere. Clogged emitters are the main cause of drip system failure, and most clogging issues occur from inadequate filtration.
Design Your Zones and Layout
Once you know where the plants and zones are located, determine how water will travel from the source to each planting area.
With your map and component list ready, lay out your tubing runs.
- Run mainline tubing from your water source along the perimeter of each planting area.
- Branch ¼" micro tubing off the mainline to reach individual plants, raised beds, containers, or plant clusters.
- Place emitters near the plant's root zone.
- For new plantings, place two emitters per plant on opposite sides to encourage root development.
- Keep zones separated by water needs. A "drought-tolerant natives" zone should run on a separate valve from a "vegetable garden" zone.
Here is a simple zoning example for an average residential yard.
- Zone 1: Foundation shrubs and hedges (moderate, weekly watering).
- Zone 2: Perennial flower beds (moderate to high water, 2–3 times weekly).
- Zone 3: Vegetable garden (high water needs, daily in summer).
- Zone 4: Trees (deep infrequent watering, once a week with longer run times).
- Zone 5: Drought-tolerant or native plants (low water, every 1 to 2 weeks).
Consider Slope and Elevation Changes
If your landscape has slopes or noticeable elevation changes, pay extra attention when designing your drip system. Water naturally moves downhill, and elevation changes can also affect pressure, which may cause some plants to receive more water than others.
For yards with steep or uneven areas, consider
- Separate irrigation zones for different elevations
- Pressure-compensating emitters
- Tubing according to the length and layout of the run
- Check valves where needed to control drainage
- Shorter tubing runs
Add a Timer or Smart Controller for Automation
Manual drip systems work, but automation is where drip system efficiency really shines. A battery-operated hose-end timer is a budget-friendly option for smaller yards, and a multi-zone smart controller is ideal for larger or more complex landscapes.
Smart controllers can further reduce water use by automatically adjusting run times based on local weather data. This is also a huge advantage during unpredictable seasons.
Install the Drip System
Once your layout is designed and materials are on hand, installation follows this order:
- Connect the backflow preventer, filter, and pressure regulator to your water source.
- Lay out and connect mainline tubing along your planned routes.
- Punch holes and insert lateral lines and emitters at each plant location.
- Secure tubing with staples or hold downs to keep it in place and prevent kinks.
- Turn on the system and check for adequate, even flow at each emitter.
Drip Irrigation Installation: 8 Things to Know Before You Start
Test the System
- After installation, run the system for a few cycles and physically check soil moisture with your finger or a moisture meter at various points. This is the best way to catch under- or over-watered spots before they become bigger problems.
- Adjust flow rates, add or remove emitters, and fix any leaks.
Flush the System Before Capping Ends
Before completing the installation, flush the tubing. Open the ends of the tubing or use the system's flush points, then run water until it is clean.
Debris can enter the system during cutting and installation. If you install emitters without flushing the lines, that debris can end up in the small emitter passages and cause clogs.
How to Maintain a Landscape Drip Irrigation System to Keep it Running Smoothly
A well-designed drip system still needs regular upkeep to perform at its best.
- Inspect the system regularly, particularly at the beginning of the irrigation season.
- Inspect emitters monthly for clogs, especially during peak growing season.
- Flush mainlines at the start and end of the season to clear sediment buildup.
- Check filters and clean or replace them as needed.
- Look for tubing damage from lawn equipment, rodents, or UV degradation.
- Adjust run times and watering frequency seasonally. Increase it in summer heat and decrease it in cooler months.
- Winterize the system in colder climates by draining lines and disconnecting critical components before the first freeze.
How Much Does It Cost to Install a Drip Irrigation System?
Drip irrigation systems are more affordable than full sprinkler installations, especially for garden beds and smaller landscapes. DIY drip irrigation kits for a typical residential yard often range from $150–$500 depending on size and component quality.
Professionally installed systems for larger or complex landscapes can range from $1,500–$4,000 or more. With the water savings over time and lower outdoor water bills, you will see a return on investment within two to three growing seasons.
Common Drip Irrigation Landscape Design Mistakes You Must Avoid
Skipping the Filter: Small particles can quickly clog emitters. Even municipal water carries enough sediment to clog emitters over time. Filtration is inexpensive compared with replacing a poorly functioning irrigation system.
Overcrowding One Zone: Too many emitters on a single line causes pressure drop and uneven watering.
Ignoring Plant Growth: Your landscape changes. As shrubs and trees mature, their root zones expand, and emitters need to be relocated outward over time. Design with mature plant size in mind.
Using the Wrong Emitter Flow Rate: Matching emitter GPH to plant needs prevents under- or overwatering.
Forgetting Seasonal Adjustments: Watering needs change between summer heat and cooler months.
Not Planning for Expansion: Leave extra mainline length if you plan to add planting beds later.
How to Improve a Drip Irrigation System with Easy Upgrades and Tips
Should You Install a Pressure Regulator for a Drip Irrigation System?
In most situations, pressure regulation is important because drip components work best within a specific pressure range. A pressure regulator protects tubing and emitters from damage and helps deliver water more consistently.
Do I Need a Filter for Drip Irrigation?
Yes, a high-quality filtration system is strongly recommended for a landscape drip system. Drip emitters have small water passages that debris and sediment can clog, which might affect the flow and damage your components.
Can I Install a Landscape Drip Irrigation System Myself?
Yes. Drip irrigation is one of the most DIY-friendly irrigation systems available. With basic tools, a clear layout plan, quality drip components and ready-to-install drip irrigation kits, you can install a functional system in a weekend.
However, larger landscapes with complex zones, significant elevation changes, or challenging water-pressure conditions may benefit from professional irrigation design and installation.
How to Winterize a Landscape Drip Irrigation System?
Before the first freeze arrives, shut off the water supply and drain the lines by opening end caps. Disconnect the tubing and store above-ground backflow preventers or timers in a dry, protected place. Insulate exposed components.
The Bottom Line
The best landscape drip irrigation system starts with a system design that matches your landscape. Designing a drip irrigation system is about understanding your landscape's unique water needs and building a system that delivers water precisely where and when it's needed. You can design your own landscape drip system by starting with the plants, not the irrigation products.
Map the property, create watering zones, understand your water supply, and choose quality components based on each planting area's needs. Do that, and you'll have a landscape that stays healthier, greener, and far more water-efficient season after season.