
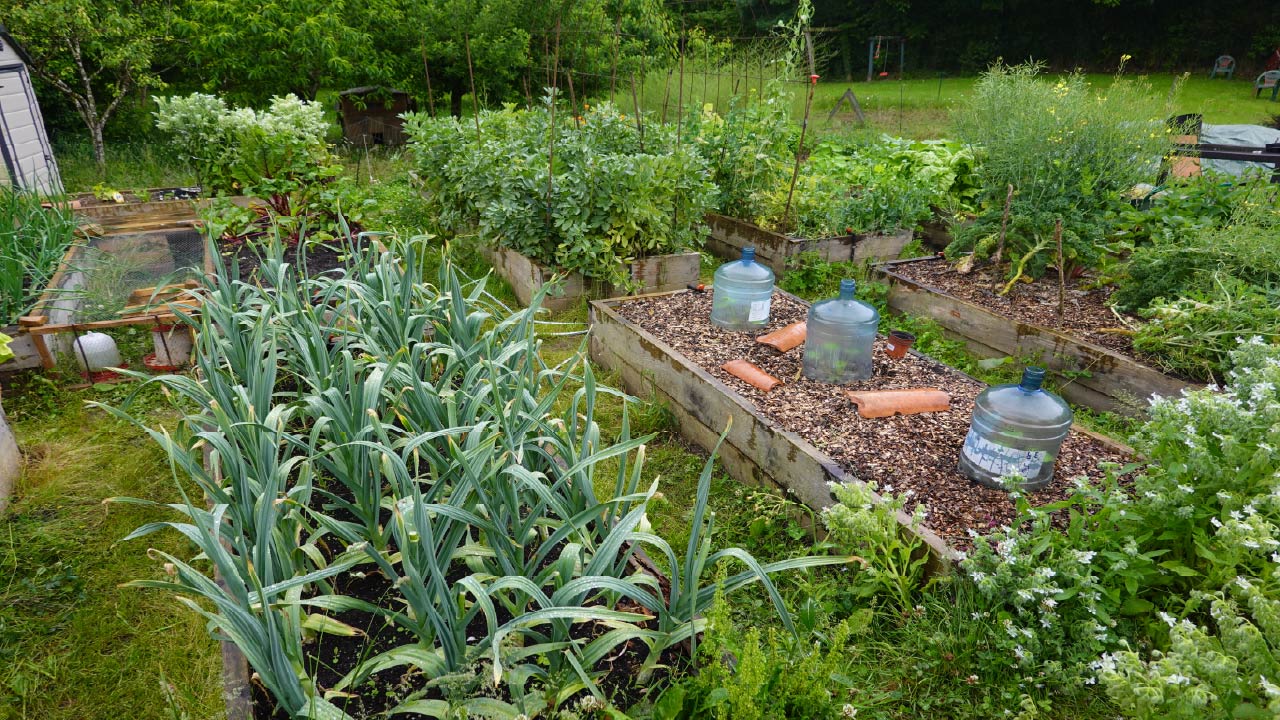
How to Water Raised Garden Beds with Drip Irrigation
Jul 8th 2026
Raised garden beds have become the modern way to grow vegetables, herbs, flowers, and fruits. These elevated beds offer better drainage, warmer soil, fewer weeds, and improved soil quality compared to traditional in-ground gardens. A thriving raised-bed garden that yields well can be achieved with optimal watering via water-efficient drip irrigation. Drip irrigation delivers water directly to the root zone of your raised bed plants, where they need it most. A properly designed garden drip system provides slow, consistent watering that keeps your raised beds growing while saving water, time, and money. Whether you're growing your vegetables in one metal raised bed or many, you must have a plan for watering your plants.
In this drip irrigation guide, our experts will teach you exactly how to water a raised garden with drip irrigation, how to design an efficient system, and the best practices for keeping your vegetables, herbs, and flowers healthy throughout the growing season.
Why Drip Irrigation Is the Best Choice for Raised Garden Beds
Drip irrigation is now considered the most efficient irrigation method for raised beds because it slowly delivers water exactly where it's needed. Compared to traditional overhead watering methods, a drip garden system can reduce water consumption by 30 to 50%.
Drip systems minimize evaporation, runoff, and weed growth by precisely applying water to crops. It gradually wets the soil rather than flooding it. However, the real secret is not running your drip system every day. You should also know how long it takes your specific raised bed mix to absorb and hold water. For example, sandy soil mixes may need shorter, more frequent watering cycles, while compost-rich soils often benefit from deeper, less frequent irrigation.
Here are the benefits that a drip irrigation system offers to raised garden beds.
- Water reaches plant roots directly.
- Leaves and stems remain dry, reducing the risk of fungal diseases.
- Less water is lost to evaporation and runoff.
- Weeds between rows receive little moisture.
- Watering can be automated with a timer.
- Plants experience less moisture stress.
- Water bills decrease.
Plan Your Raised Bed Irrigation Layout
The first thing to do is map your garden.
Consider:
- Number of raised beds
- Bed dimensions
- Plant spacing in each bed
- Distance from water source
- Sun exposure
- Water pressure
A simple sketch can prevent you from making costly mistakes during installation. For example, a 4×8-foot raised bed typically requires three to four parallel drip lines evenly spaced across the bed. Make sure every plant's root zone receives adequate moisture.
Water Raised Beds Differently Throughout the Season
Your irrigation schedule for a raised bed garden shouldn't stay the same from April through September. Instead, divide it into four phases.
Establishment Phase
New transplants have shallow roots. Give frequent, shorter watering's to help them settle into the soil.
Vegetative Growth
Plants start expanding rapidly. Watering should be deeper but less frequent to encourage root growth.
Fruiting Phase
Tomatoes, peppers, cucumbers, and squash require highly consistent moisture to produce healthy fruit. Large changes between wet and dry soil increase fruit cracking, blossom-end rot, and bitterness.
Harvest Phase
As harvest approaches, slightly reduce irrigation for crops such as onions, garlic, potatoes, and winter squash to improve storage quality. Different crops have different finishing needs.
Popular Design Layouts for Raised Beds
There is no one-size-fits-all irrigation layout. The design of your system depends entirely on what you like to plant and how your beds are arranged. Here are the three most common raised garden bed designs used by gardeners and landscapers.
The Grid System
If you practice square foot gardening or plant dense rows of greens, carrots, and radishes, the grid system is a perfect choice.
A grid layout uses interconnected drip lines that run both lengthwise and crosswise through the raised bed. In this layout, you run a 1/2-inch mainline along the short inside wall of the bed, then attach parallel rows of 1/2-inch emitter tubing across the length of the bed. This creates a network that uniformly delivers water throughout the planting area, ensuring no seed is left dry. Water is delivered from multiple directions, so there are very few dry spots.
Best for: Square foot gardens, intensive vegetable gardening, herb gardens, leafy greens, and flower beds.
Parallel Drip Line Layout
The parallel drip line layout is a common design for most raised vegetable beds. In this layout, multiple drip lines are installed side by side across the bed to provide uniform water coverage throughout the planting area.
This layout is ideal for vegetables planted in rows or closely spaced crops because every area of the bed receives a similar amount of moisture.
Recommended spacing:
- Place drip lines about 10 to 12 inches apart.
- Place the outer lines 4 to 6 inches from the bed edges for full coverage.
Serpentine Loop Layout
In a serpentine layout, a single length of drip tubing winds back and forth across the raised bed in a continuous "S" shape. For beds that mix flowers, herbs, and various vegetable crops, flexibility is important. This layout is best for mixed beds and changing layouts.
Using solid 1/2-inch tubing or 1/2-inch emitter tubing with wide spacing, you snake the line. Secure the tubing with landscape staples or hold-downs. If you use solid tubing, you can punch individual emitters where your plants are. This drip layout uses fewer fittings than multiple parallel lines, making installation quick and affordable.
Best for: Small vegetable beds, narrow raised beds, flower gardens, and herb gardens.
Water Your Raised Beds with Raised Bed Drip Irrigation Kits
If you want to boost your plants' growth while reducing water use, DripWorks offers high-quality raised garden bed drip irrigation kits for your garden. We have drip irrigation solutions for everything from large gardens to small and medium raised beds. You get a lot of drip line tubing and a ton of connectors at an affordable price. All the tees, elbows, and couplings are easy to wiggle into place on the tubing and secure with no leaks once in place. The raised bed irrigation kit gives you everything you need to fit any raised bed shape or style.
DripWorks kits allow you to arrange the drip lines in parallel rows, making it easier to adapt the system for vegetables planted in rows, square-foot gardens, or mixed planting layouts. If your crop plan changes from season to season, you can reposition the tubing without rebuilding the entire irrigation system.
Here is how to get the best results with a DripWorks Raised Bed Drip Irrigation Kit:
- Place the drip lines 10-12 inches apart for uniform soil coverage.
- Position the outer lines a few inches in from the bed edges to prevent dry borders.
- Cover the tubing with a few inches of organic mulch to reduce evaporation and protect the lines from sun exposure.
- Pair the system with a battery-operated or smart irrigation timer to maintain consistent watering when you're away or during periods of extreme summer heat.
- At the start and end of the season, flush the lines and inspect the fittings before storing or winterizing the system.
Step-by-Step Process to Install a Raised Bed Drip Irrigation System
Installing drip irrigation in raised beds is simple with these steps.
Step 1: Connect to the Water Source
Assemble the head assembly components. Attach your backflow preventer, timer, pressure regulator, filter, and 1/2-inch adapter to your outdoor faucet or spigot.
Step 2: Lay the Main Tubing
Unroll your 1/2-inch polyethylene mainline. Lay the tubing out in the sun for 30 minutes to soften it and make it easier to work with. Run the main supply line along the ground from your source to the base of your raised beds. Secure the main tubing using landscape stakes. Avoid unnecessary sharp bends that can reduce water flow.
Step 3: Lay the Grid and Install Drip Lines
Follow your chosen layout and place drip tubing across each raised bed. Keep lines straight and evenly spaced.
Step 4: Connect Everything Together
Use barbed or compression fittings (Tees, Elbows, and Straight Connectors) to connect your lines. Push the tubing firmly onto the barbs until it's secure.
Going "Up and Over"
To get the tubing into the raised bed smoothly, cut the mainline at the base of the bed. Use a 90-degree elbow fitting to run the tubing vertically up the outer wall, and another elbow to bring it over the top edge and down onto the soil surface. Secure it to the wood or metal raised bed frame using tubing clamps or staples.
Step 5: Anchor the Lines
Use metal staples every 2 to 3 feet to hold the tubing flat against the soil. If the lines twist or lift, water will run down the tubing rather than absorb into the soil.
Step 6: Flush the Lines
Do not seal the ends of your lines. Turn on the water faucet fully and let it run for 1 to 2 minutes. This will remove any dirt, particles, or debris that slipped into the lines during installation.
Step 7: Cap the Ends
Once the water runs crystal clear, turn it off. Install end caps to seal the open ends of your drip line. Now you can start watering your raised garden beds.
Learn How to Install Drip Irrigation in Raised Metal Beds
How Long Should You Run Raised Bed Drip Irrigation System?
Every garden has unique water needs based on the unique climate, plants, soil, season, temperatures, and rainfall patterns. It also depends on how thirsty your plants are. Larger, mature plants generally require more water than smaller ones. Soil covered with a nice layer of mulch will stay moist longer than bare soil, reducing water needs.
Drip irrigation run time also depends on emitter flow rate and soil conditions. Many raised beds perform well with watering lasting 20-60 minutes.
It is always recommended to provide less frequent, deep, long watering rather than shallow watering every day. This will promote deep, healthy roots and stronger, drought-tolerant plants.
Try to water your plants enough to keep the soil evenly moist, but not constantly soggy. Also, allow the soil to dry out slightly between watering's but never fully dry. Always adjust run times based on rainfall and seasonal temperatures.
How Mulch Improves the Performance of a Raised Bed Drip System
Without mulch, soil temperatures fluctuate more, surface evaporation increases, and drip emitters cycle more frequently.
With a 2- to 3-inch mulch layer around your plants, the soil will remain moist longer, soil microbes will remain active, water consumption will be reduced, and organic matter will break down more efficiently.
Bonus Tips for High-efficiency Drip Watering
If you want to take your raised-bed gardening game to the next level, adopt these practices.
Use Pressure-Compensating (PC) Emitters
If your raised beds are on a slope, or if you have a long run of multiple beds, basic emitters will produce more water at the start of the line than at the end. PC emitters are the best choice to ensure every plant receives the exact same amount of water, regardless of elevation changes or tubing length.
Separate Zones by Water Needs
Do not put herbs like lavender, rosemary, and thyme in the same irrigation zone as water-loving crops such as tomatoes, cucumbers, and melons. Group your plants by their watering needs.
Winterize Raised Bed Drip System
Winterize your raised bed drip system before freezing conditions arrive. Drain the system and protect the tubing with a nice deep layer of mulch. Store components indoors in a protected place. Leaving standing water in pipes or valves can cause them to crack when the water freezes and expands.
Is Drip Irrigation Worth the Investment?
Absolutely yes. Installing a drip irrigation system requires an upfront investment, but you'll quickly recover the cost through water savings, healthier plants, consistent harvests, reduced water waste, and increased garden productivity.
Instead of spending time dragging hoses around the yard every morning, you can automate watering with a timer and focus on planting, harvesting, and maintaining your garden.
For busy homeowners and landscapers managing multiple raised beds, drip irrigation offers convenience that traditional watering methods simply can't match. With the automatic drip system, you don't have to worry about watering your raised garden.
The result is stronger plants, more consistent harvests, and less wasted water throughout the growing season.
Read More: Summer Garden 2026: 8 Ideas and Maintenance Tips
The Bottom Line
Drip irrigation is the most efficient watering solution that makes your raised bed gardening easier, more productive, and more enjoyable. Whether you're growing vegetables, fragrant herbs, colorful flowers, or small fruits in your metal raised beds, drip irrigation helps maintain consistent soil moisture, conserve water, and minimize daily garden maintenance.
Pair your drip system with healthy soil, organic feeding, and a programmable timer, and you'll create a highly efficient watering routine that supports strong growth and abundant harvests season after season. Invest in the right irrigation setup for your raised beds to enjoy healthier plants, lower water usage, and a thriving garden for years to come.