
How to Install a French Drain: DIY Guide
Oct 16th 2026
A beautiful lawn and garden can become a frustrating mess when water has nowhere to go. A properly installed French drain can collect excess groundwater and redirect it away from problem areas. It helps dry out a soggy lawn, protect your home's foundation, improve conditions around garden beds, and make your outdoor space more usable after heavy rainfall.
If you're exploring French drains, you're probably already facing some yard drainage issues and looking to learn what problem a French drain can solve and whether one is right for your property. It is one of the most reliable drainage solutions available, and many gardeners can tackle it themselves over a weekend. So you can, too, protect your yard and home.
Let's find out everything you need to know about installing a successful French drain in the yard to address poor drainage.
What Is a French Drain?
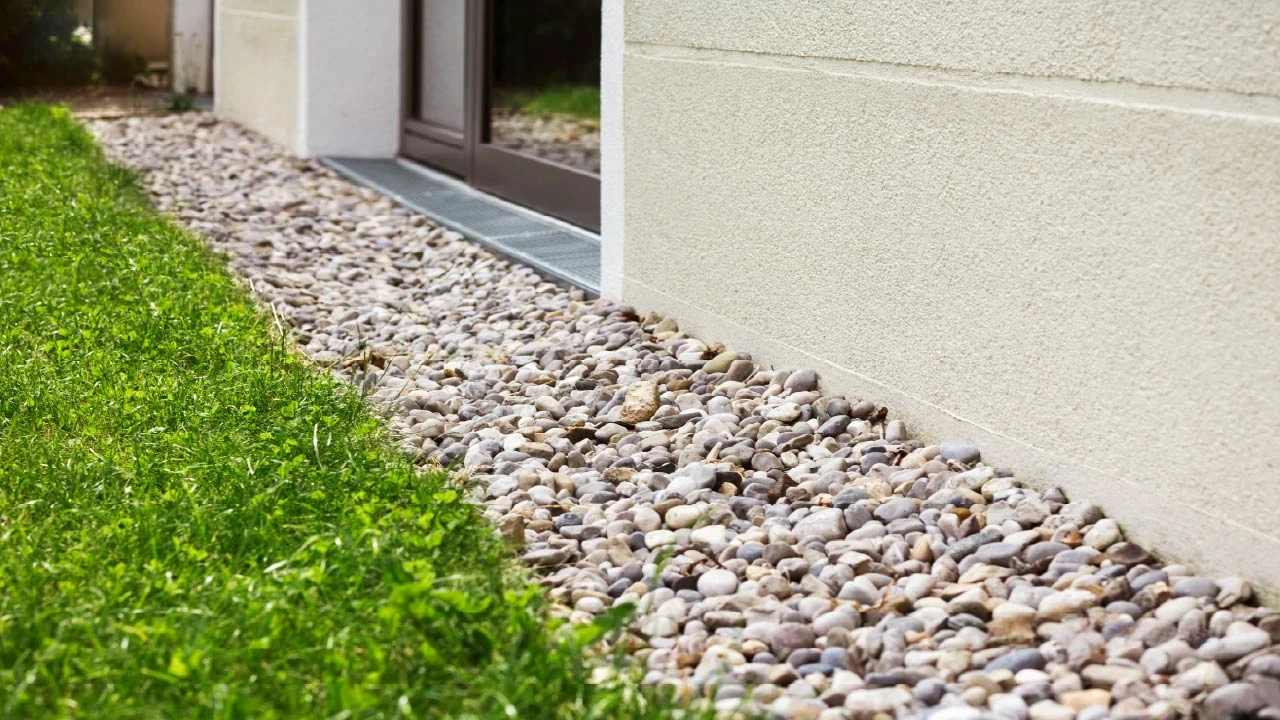
A French drain is an underground trench filled with gravel or rock that contains a perforated pipe. It collects and redirects surface water and groundwater away from pooling areas. Instead of accumulating on your soil or seeping into your foundation, a French drain gives water an easy path down into the gravel, into the pipe, and away to a safer drainage point.
A traditional French drain design consists of a trench, permeable landscape or filter fabric, gravel or drainage stone, a perforated drainage pipe, and an outlet where collected water can safely discharge.
Think of a French drain as creating an easier path for water to follow. Water enters the gravel-filled trench, moves toward the perforated pipe, and then travels through the pipe toward the drainage outlet.
French drains are commonly used to:
- Redirect water away from home foundations and basements.
- Dry out soggy lawns and low-lying yard areas.
- Protect retaining walls from water pressure buildup.
- Keep garden beds and planting areas from becoming waterlogged.
- Manage runoff from downspouts and sloped driveways.
How Does a French Drain Work?
A French drain captures excess water before it becomes trapped in the soil or collects on the surface. Water naturally flows downhill and seeks the easier path. A French drain is built with a slight downward slope, so gravity pulls water through the gravel, into the perforated pipe, and along the pipe to a designated discharge point.
The drain process works like this:
The Trench: A sloped channel dug into the soil that directs water flow downhill.
Clean Gravel: Gravel surrounds the pipe and allows water to filter down quickly instead of pooling on the surface. Water exits at a safe drainage location. The gravel is important because it allows water to move.
Perforated Drainage Pipe: Water moves downward and into the heavy-duty perforated pipe. The perforated pipe collects filtered water, carries water along the sloped trench, and channels it away.
Landscape fabric: A specialized filter fabric lining coats the trench walls and bottom. It separates the surrounding soil from the gravel, reducing the sediment that can enter and eventually clog the drainage system.
Signs You May Need a French Drain in Your Yard
Not every puddle or damp lawn area means your yard needs a full drainage project. A small amount of temporary standing water after a heavy storm may disappear on its own. However, certain warning signs point clearly to a drainage problem you must solve. Watch for these signs that indicate you need to install a French drainage system.
- Standing water that remains for 24 hours after rain.
- Soggy, spongy lawn that squishes underfoot even on dry days.
- Water pooling near your home's foundation or crawl space.
- Soil erosion or bare patches where water repeatedly cuts through the lawn.
- Mold, mildew, or a musty smell near basement walls.
- Wet areas near retaining walls.
- Plants that are constantly wilting, yellowing, or rotting at the roots despite care.
- A consistently soggy section at the bottom of a slope.
How to Prevent Future Flooding in Your Yard with Proper Drainage?
Step-by-Step French Drain Installation Process
Installing a French drain is a manageable DIY project, but it involves substantial digging and planning. Larger drainage problems may require excavation equipment or professional help.
Materials and Tools You'll Need
Before you start digging, gather these supplies. Having everything on hand before you start digging will save you multiple trips to the store.
Materials:
- Perforated drain pipe (4-inch flexible corrugated pipe or rigid PVC)
- Landscape fabric or filter fabric
- Washed gravel or drain rock
- Pipe fittings, couplers, and end caps as needed
- Pop-up drainage emitter or connection to a dry well or storm drain
- Topsoil and grass seed or sod
Tools:
- Spade or trenching shovel
- String and stakes to mark slope
- Wheelbarrow
- Rake
- Landscape fabric staples
- Rented trencher for longer runs
- Work gloves and safety glasses
Got the tools? Now here's how to install a French drain in your yard from start to finish.
Assess the Problem
Walk your property after a rainstorm and observe exactly where water collects and which direction it naturally flows. Your French drain needs a clear starting point (the wet area) and a clear ending point. It can be a storm drain, street gutter, dry well, or a low area far from structures and neighboring properties.
Observe the yard during and after rainfall and then ask yourself:
- Does the water come from rainfall?
- Is runoff flowing downhill from another part of the property?
- Does the area have naturally poor drainage?
- Is the yard relatively flat?
- Is irrigation contributing to the runoff problem?
Plan a Safe Drainage Route
Every French drain needs a safe spot for the water to go. Possible water discharge locations may include:
- A lower area of the property
- A suitable drainage ditch
- A dry well designed for the site's conditions
- A municipal drainage connection where permitted
- Another approved drainage area
Map out the drainage route with stakes and string and check your local grading and drainage codes. Some municipalities have drainage rules about discharging water onto neighboring lots or public streets. Don't simply direct water toward your neighbor's property. The outlet should handle the water volume without causing erosion or creating another drainage problem.
Mark the French Drain Route
Next, mark the route once you understand where the water originates and where it will be discharged. A French drain should follow a path that allows water to move continuously toward the discharge point.
Use stakes, marking paint, or string to visualize the route.
Try to avoid unnecessary sharp turns. A direct route makes installation easier and reduces potential points where debris may accumulate.
Call 811 Before You Dig
This step is non-negotiable. Never start digging without first considering what may be underground. Depending on your location, buried utilities may include water lines, gas lines, electrical lines, irrigation pipes or sewer lines.
So, before any digging project, call 811 or submit an online request to have utility lines marked. Hitting a gas, electric, or water line is expensive, dangerous, and completely avoidable with this step.
Dig the French Drain Trench
Trench size depends on the project. Dig a trench along your planned route following these numbers.
- 6 to 18 inches wide. 12 inches is a comfortable standard for most yard drains.
- 18 to 24 inches deep for a standard yard French drain.
- Sloped at roughly a 1% grade (1 inch of drop per 8 feet of length) toward the discharge point.
Use a line level or laser level to check your slope every few feet. Accuracy matters because a flat or reverse-sloped trench will leave water sitting in the pipe instead of draining away.
Line the Trench with Landscape Fabric
Once the trench is prepared, lay landscape fabric along the bottom and sides. Leave enough fabric overhang on both edges to wrap over the gravel later. This fabric barrier keeps fine soil particles from mixing into the gravel and clogging your drain pipe over the years.
Tip: Choose a fabric designed for drainage applications, not an extremely thin material that may tear up during installation.
Add a Base Layer of Drainage Gravel
Add 2 to 3 inches of clean drainage gravel to the bottom of the trench. The amount can vary depending on trench depth and pipe size. The gravel should allow water to move freely through the trench.
Avoid using soil, fine sand or materials that can compact and block water movement. Washed drainage stone is often preferred for French drains because it contains fewer fine particles that could clog the system. After adding the gravel, check the slope again.
Lay the Perforated Drainage Pipe
Position your perforated pipe on top of the gravel bed with the holes facing downward. This allows water to seep up from the ground into the pipe more effectively.
Afterward, connect any couplers, fittings, or elbows needed to follow your trench route, and attach the discharge end to your dry well, pop-up emitter, or storm drain connection.
Cover the Pipe with More Gravel
Once the pipe is in place, add clean gravel on top of and around it, filling the trench to within a few inches of ground level. This gravel layer allows surface water to filter down quickly and reach the pipe.
The amount of gravel above the pipe can vary based on the overall trench depth and whether the drain will remain visible or be completely buried.
Fold the Filter Fabric Over the Gravel and Backfill
Bring the extra filter fabric from both sides over the gravel. This creates a barrier that helps prevent topsoil from working its way down into the gravel. Then backfill the remaining trench depth with soil and tamp it down gently as you go.
Restore the Surface
Finish the French drain project by covering the remaining trench depth with topsoil, mulch, sod, ground covers, or decorative stones.
If the French drain runs through a lawn, lay the sod to blend the installation into the surrounding landscape.
Once everything is in place, test your new French drain by running a hose. Watch the setup to confirm water flows smoothly through the drainage system and exits cleanly at the discharge point.
Common French Drain Mistakes to Avoid
A French drain installation is simple, but several common mistakes can reduce its effectiveness. If you're a first-time installer, avoid these mistakes for a successful installation.
Incorrect Slope
Without a consistent downward grade, water will sit stagnant in the pipe instead of draining. Too little or inconsistent slope can allow water and sediment to settle inside the system. Always maintain a minimum 1% drop.
Skipping the Landscape Fabric
Without a proper filter layer, surrounding soil will slowly enter the gravel and reduce drainage capacity. This causes silt buildup and clogs the system within a few years.
Choosing the Wrong Gravel
Rounded pea gravel compacts and drains poorly compared to angular, washed drain rock. Also, use clean, washed gravel. Fines and rock dust from unwashed gravel will wash into the pipe and quickly clog the system.
No Clear Discharge Point
A French drain that drains water into another low spot on your property just relocates the problem instead of solving it.
Digging Too Shallow
A shallow trench won't collect groundwater effectively and may get damaged by lawn equipment or foot traffic.
Ignoring Local Drainage Codes
Some municipalities, homeowners' associations, and local authorities have installation rules regarding storm water discharge. Some areas regulate where you can discharge water, especially onto neighboring properties.
How to Maintain a French Drain
A properly installed French drain requires little maintenance, but you shouldn't forget it. Here are some French drain maintenance tips.
System Check: Inspect the French drain system regularly, especially after major storms.
Inspect Outlets Seasonally: Check the discharge point every few months to make sure leaves, mud, or debris aren't blocking it. Clear away leaves, grass clippings, and debris from pop-up emitters, dry wells, or grates every spring and fall.
Flush the Line Annually: Open the cleanout cap at the high end of your system and run a high-pressure garden hose through the pipe to remove all accumulated sediment.
Keep Heavy Machinery Off the Trench: Do not drive riding mowers, tractors, or cars over shallow French drains to avoid crushing flexible pipes.
Keep an Eye on Lawn: Watch out for new soggy spots, which could indicate a partial clog or a shift in the pipe.
Plant Carefully: Avoid planting trees or shrubs with deep root systems directly over the drain line.
Essential Tips for Maintaining Effective Yard Drainage
The Bottom Line
French drain installation can be one of the most effective ways to solve persistent yard drainage problems. A well-designed, sloped French drain lined with fabric and packed with clean gravel is one of the most durable landscape upgrades you can make. Now waterlogging and soil saturation cannot ruin your garden or harm your home's foundation.
Whether you are dealing with a soggy lawn, waterlogged garden beds, runoff near the foundation, or a landscape that never dries out, the right drainage system can make the entire property healthier and more usable.
With the right planning, tools, drainage solutions, and a bit of effort, this setup truly pays for itself every season.