
How to Repair Drip Tape: Fix Leaks, Holes, and Damaged Sections
Sep 21st 2026
Drip tape is one of the most efficient drip-watering tools for vegetable gardens, raised beds, and commercial farms. However, thin-walled drip tape is delicate. A sharp garden tool, a hungry rodent, a loose connection, or extreme water pressure can leave you with a leaking, torn, or damaged line. A single leak in drip tape can ruin water pressure across an entire row, leaving some plants drowning while others suffer from drought.
The good news is that most drip tape problems are easy to repair. You usually do not need to replace an entire roll of drip tape because of one hole or split. Mostly, a small repair fitting and a few minutes of work are enough to get water flowing properly again. So, if you use drip irrigation, you need to know how to repair drip tape quickly and effectively. This will help you save water, protect your crops, and keep your irrigation system running at peak performance all season long.
In this blog, our irrigation experts cover everything you need to know from finding leaks and causes of drip tape damage to the essential steps for different types of repairs, and how to prevent the same problem from happening again next season. Let's start.
What Is Drip Tape?
Drip tape is thin-walled, flat polyethylene tubing with built-in emitters spaced at regular intervals of 4, 8, or 12 inches. It is lightweight, affordable, and ideal for row crops, raised beds, and home gardens because it delivers water slowly and directly to the root zone.
But its thin wall, which is usually between 6 and 15 mils thick, is also its biggest weakness. Unlike rigid drip line or PVC piping, drip tape can be easily torn. Understanding why damage happens is the first step toward preventing it and knowing what kind of repair you're dealing with.
Common Causes of Drip Tape Damage
First, let's look at why drip tape gets damaged so you can repair it better and prevent the same issue from happening again.
Rodents and other Animals
Mice, voles, squirrels, and even birds are infamous for chewing through drip tape, especially during summer. If you repeatedly find small punctures or chew marks in the same area, animal damage may be the cause.
Garden Tools
Hoes, tillers, shovels, and foot traffic are also leading causes. They can puncture or cut the tubing. This often happens when drip tape is covered with mulch or partially buried in soil, making it difficult to see.
UV Degradation
Constant exposure to sunlight breaks down the plastic over time, making the tape brittle and prone to cracking, especially at unburied sections. Not all drip tape is designed for long-term exposure to intense sunlight.
Excess Pressure
Drip tape is designed to operate at low pressure (most tape is rated for 8–12 PSI). Running drip tape at higher PSI than it's rated for can cause it to split or emitters to blow out entirely.
Sharp Bends or Kinks
Folding the tape too tightly around corners or stakes weakens the plastic and eventually leads to cracks.
Freeze Damage
In areas with freezing conditions, water left in the lines over winter can expand and split the tape, especially at connectors and fittings. So winterization is essential.
Age and Wear
Thin-wall drip tape is often designed for seasonal or short-term use. Thicker products may last longer depending on the material, climate, operating pressure, and installation conditions. Even with perfect care, drip tape usually lasts one to three growing seasons before it becomes too brittle or clogged.
How to Find a Leak in Drip Tape
Before you can repair anything, you need to find the damage, which is not always as obvious as it sounds. Small pinholes can be hidden when the tape is buried under mulch or soil. However, some leaks are obvious. You may see water spraying several feet into the air or pooling heavily around one section of the garden. Others can be much harder to detect.
Run the system and walk the lines
The easiest way to find a leak is to turn on the irrigation system and inspect the drip tape while it is running. Walk the entire length of the tape, looking for spray, misting, or unusual pooling. Track down the leaks by looking for:
- Water spraying from the side of the tape
- Unexpected puddles or muddy areas
- Excessive wetness between plants
- Look for unusually lush or soggy patches
- Check the end of the line
- Water escaping from the end of the tape
- Drip tape that appears split or inflated
- Loose or leaking fittings and connections
Top Drip Tape Irrigation Brands for Your Farm and Garden
Tools and Supplies You'll Need to Repair a Drip Tape
Once you locate the leak or damage in drip tape, gather the tools you will need to make repairs, so you don't have to make multiple trips back to the shed. A basic drip tape repair kit is inexpensive and worth keeping on hand all season.
Tool List
- Drip tape repair couplers (usually ⅝")
- A sharp utility knife or tubing cutter
- Drip tape end caps
- Short piece of replacement drip tape
- A rag or towel to dry the area before working
Most of these items are inexpensive or can be found in the repair kits. Keep repair fittings in your garden shed all year rather than buying supplies after damage happens.
How to Repair a Small Hole or Pinhole Leak in Drip Tape
Small punctures that are caused by a rodent nibble, a stray thorn, or a garden tool are the easiest and fastest repairs. You can sometimes repair a tiny puncture with a specialized repair plug or fitting designed for your tape. However, cutting out the damaged area and reconnecting the tape is often the most dependable repair, which we discuss in the next heading.
How to Repair a Tear, Split, or Hole in Drip Tape
If the damage is a pinhole, a crushed section, a long tear, or a split from over-pressurization, cut out the damaged section and rejoin the drip tape with a coupler.
Turn Off Water
Shut off the water supply to the affected zone. If the system is connected to an automatic controller, make sure the zone is completely shut down.
Find the Damage
Locate the full extent of the damage. Inspect the drip tape carefully and identify the hole, tear, or split. Run your fingers along the tape a few inches in each direction to make sure you're not missing a hidden crack.
Cut the Damaged Part
Next, use scissors or a tubing cutter and cut out the damaged section. Make clean, straight cuts on both sides of the damage. Remove enough tape material to cut out the entire weakened section.
Install a Drip Tape Repair Coupling
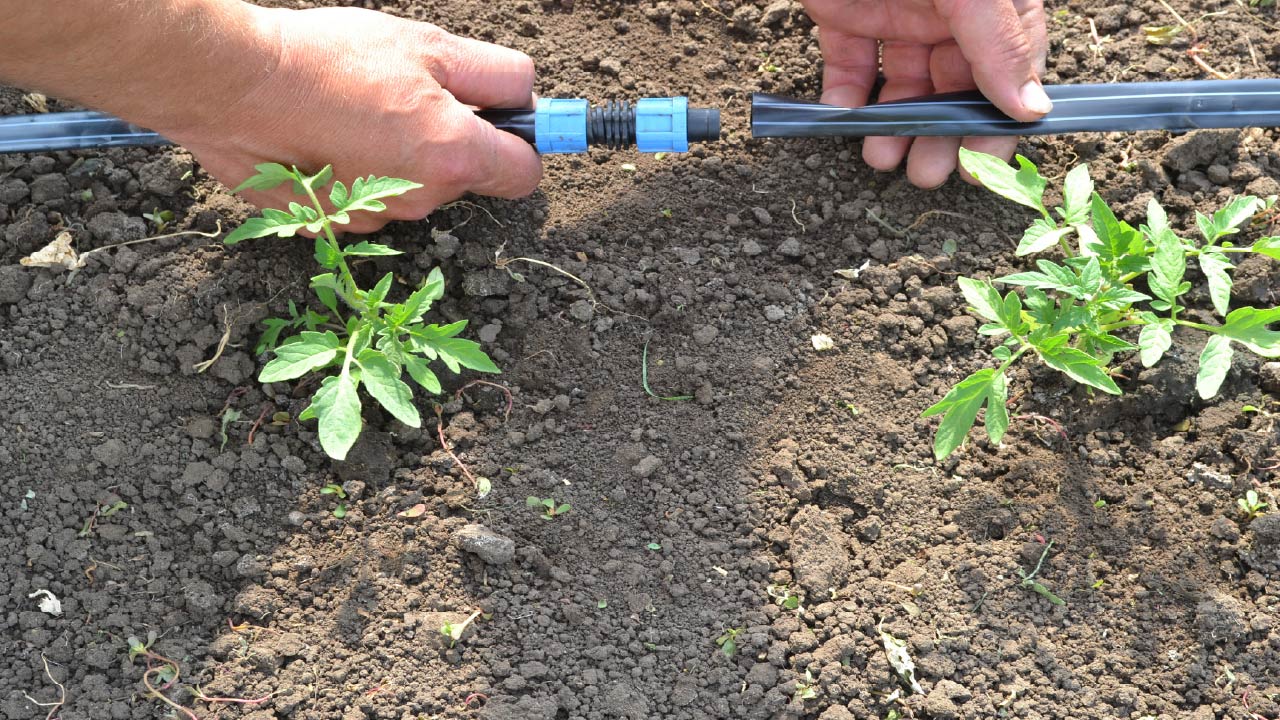
Insert a repair coupling fitting into one open end of the tape, push it in until it's snug. These fittings may use twist-lock mechanisms and tape-specific locking rings. Push the other end of the tape onto the opposite side of the coupler and secure it in place.
Turn On the Water
Turn the water back on slowly and check both connection points for leaks. Once the connection remains dry and secure, the repair is complete.
How to Replace a Damaged Section of Drip Tape
If a lawnmower, tiller, or animal has chewed out a tape section larger than 2 or 3 inches, inserting a single coupler will pull the line too tight and strain the connections. You will need two drip tape couplers and a short length of replacement drip tape.
Steps
Cut Out the Damaged Section: Make clean, square cuts on both sides of the damaged section and remove the entire crushed area.
Measure the Patch: Cut a fresh length of matching drip tape about 2-4 inches longer than the gap you removed.
Attach Couplers: Install a repair coupler at each end of the new patch section.
Install the New Part of Tape: Insert the open ends of the line into the free ends of the couplers, then tighten the locking nuts firmly.
Inspect and Flush the Line: Open the end cap of your row, flush out any soil or debris, re-cap, and run a pressure test.
How to Repair a Damaged Drip Tape Connector or Fitting
Sometimes the leak isn't in the tape at all, and the problem is where the tape connects to the mainline, header, or a T-fitting. Here are steps to find and repair a damaged connection.
- Check for cracks in the plastic fitting. Cold weather and UV exposure make these fittings brittle over time.
- Replace cracked fittings entirely rather than patching them. They're inexpensive and not worth the risk of a bigger failure later.
- Make sure the drip tape is fully pushed onto the barbed fitting. A common cause of "leaks" is simply a connection that was never pushed on far enough.
- If the end of the drip tape is damaged, cut off the damaged portion and install a new end cap.
Using Repair Tape for Minor Leaks
When you need an immediate temporary fix, cannot cut the line, and need time to make a more permanent repair, self-fusing silicone tape is an ideal choice. Repair tape fits that role beautifully, especially for low-pressure zones.
Steps
- Turn off the water, thoroughly clean the tape surface and dry it.
- Peel off the protective cover of the silicone tape.
- Starting 1 to 2 inches before the hole, wrap the tape around the line while stretching it tightly.
- Wrap across the hole with at least a 50% overlap per turn, extending 1 to 2 inches past the damaged spot until you seal the damaged area
- Press the repair tape firmly in place. Allow 3–5 minutes for the silicone layer to fuse into a single continuous sleeve before restoring water flow.
How to Prevent Future Drip Tape Damage
The easiest drip tape repair is the one you never have to make. Repairing drip tape is quick, but preventing damage in the first place saves you time during the busiest parts of the growing season. A few smart maintenance habits can significantly reduce the risk of leaks.
Run your System at the Correct Pressure
Install a pressure regulator designed for drip tape (most need 8–15 PSI) to prevent blowouts. Make sure the operating pressure matches your specific drip tape's requirements.
Install a Filter
Sediment and debris in your water source can clog emitters and cause pressure buildup that puts strain on the tape. A filter protects the emitters from sediment and clogging.
Cover the Tape
Bury or cover tape with mulch where possible to protect it from UV rays and reduce rodent access.
Avoid sharp bends
Use elbow fittings at corners instead of folding tape sharply.
Flush the System
Flush drip tape before and during the season, as needed. Open the ends of the lines and allow water to flow long enough to remove debris.
Store Tape Properly in the Off-Season
Drain all water from the tape and coil it loosely. Then, keep it out of direct sunlight and away from rodents in a shed or garage.
Inspect Regularly
Inspect a drip tape system weekly during the growing season to catch small leaks before they become major repairs.
Keep a Repair Kit
Keep goof plugs, repair couplers, drip tape sections, and end caps in your toolbox. This will help you fix a leak in five minutes instead of a delayed watering cycle.
Watch for Animal Activity
If you notice chew marks on your tape, consider row covers, repellents, or relocating mulch that might attract pests.
Protect the Tape from Garden Tools
Mark the location of your irrigation lines before you dig or grow plants. This is especially important when drip tape is hidden under mulch.
Secure Your Lines
Unsecured drip tape twists and snakes as it expands with hot water and contracts when cold. So, you should use plastic or wire landscape staples every 5 to 10 feet to hold the tape flat against the soil and prevent it from catching on tools or lawnmowers.
The Best Drip Irrigation Systems for Raised Beds, Gardens, and Row Crops
When to Repair Drip Tape vs when to Replace
You can't fix every damaged section of the tape.
- Repair if the tape is less than two seasons old, damage is only in one or two spots, and the surrounding tape is still flexible.
- Replace the tape if you're finding multiple leaks along the same run, the tape feels brittle or cracks when bent, or the emitters are clogged beyond flushing.
The Bottom Line
Knowing how to repair drip tape can save you from wasting your water and replacing an entire irrigation line because of one small problem. Drip tape repairs are often simple. With the right drip tape repair tools and a little know-how, fixing drip tape is one of the simplest garden maintenance tasks.
Keep a few drip tape repair couplers and a pair of tubing cutters in your garden toolbox. A quick five-minute repair can save your plants from stress later and keep your irrigation system running all season.