
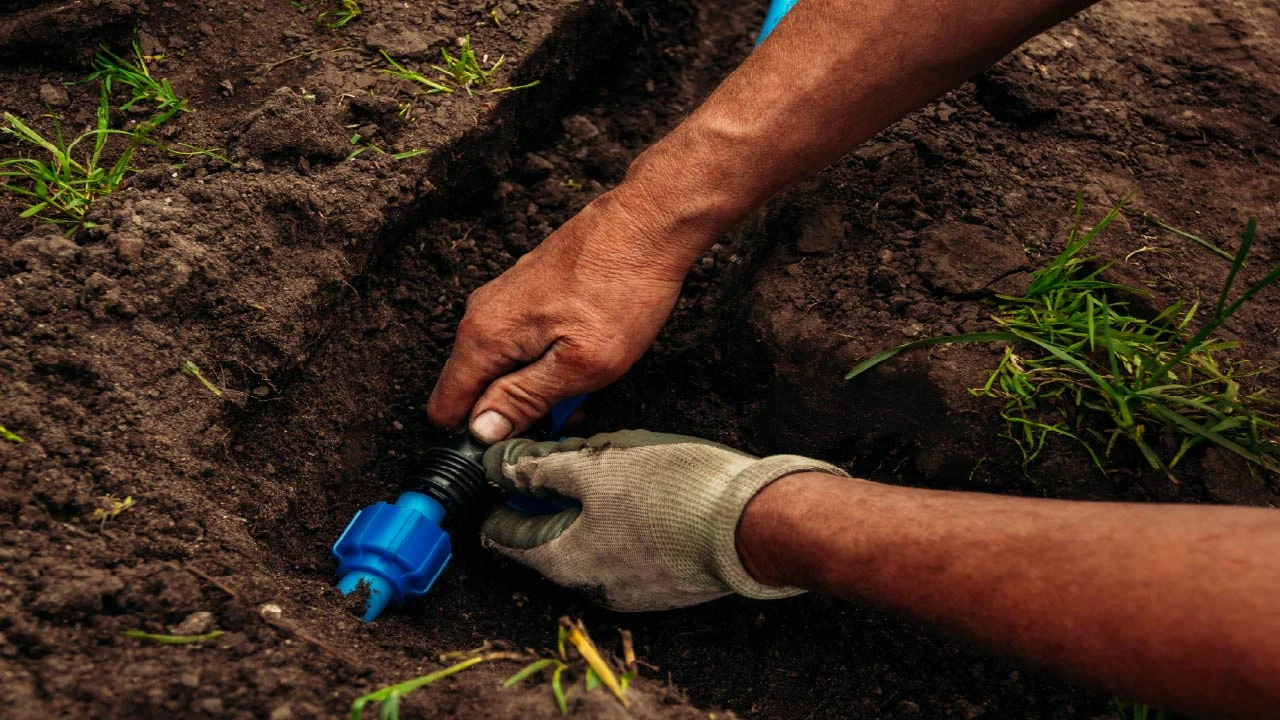
How to Add a Drip Zone in an Existing Sprinkler System?
Nov 3rd 2026
Adding drip irrigation means adding low-volume and precise watering to part of the sprinkler system. Instead of spraying water into the air, drip systems deliver water slowly near plants' root zones. Drip irrigation is often a good upgrade when spray heads are wasting water on mulch, fences, windows, sidewalks, driveways, or the street. It is one of the smartest ways to improve water efficiency, simplify garden maintenance, and give plants the ideal amount of moisture they need.
If you already have an automatic lawn sprinkler system, you don't need to install an entirely separate irrigation system to start watering flower beds, vegetable gardens, or landscape containers with drip irrigation. You can convert an existing sprinkler zone into a drip irrigation zone by replacing its sprinkler heads with a suitable drip irrigation setup, or you can add a dedicated new drip zone. The process needs a few important components, including a filter, pressure regulator, drip tubing, emitters, and compatible fittings.
In this article, we'll discuss the process of how to do it, which parts you need, and how Dripworks drip irrigation products make the process much simpler and smoother.
Why Add a Drip Irrigation Zone to Your Sprinkler System?
First, you should understand why so many gardeners and landscape pros are switching to drip irrigation for garden beds and landscaping. Traditional sprinklers work well for lawns and large open spaces, but they aren't always the best option for every part of a landscape. Adding a dedicated drip zone offers these advantages.
- Saves water. Drip irrigation delivers water directly to the root zone and uses 30–50% less water than overhead spray.
- Healthier plants. Targeted watering means dry foliage and fewer fungal problems like powdery mildew and blight.
- Fewer weeds. Water only goes where your plants are, so the space between them stays dry.
- Better coverage. Slow, steady watering soaks deep into the soil instead of running off. A drip system is highly helpful on slopes and clay soils.
- Convenient automation: You can operate the new drip zone through your existing irrigation controller instead of manually watering garden beds.
- Water-restriction friendly. Many Western and drought-prone areas allow drip irrigation even when sprinklers are restricted. Check your local rules.
Important Things to Consider Before Starting a Conversion Process
Don't randomly attach the drip zone to a lawn sprinkler zone without checking pressure, flow, filtration, valve setup, controller capacity, and the area's watering need. Consider a few crucial things before you start.
Check the existing irrigation valve
Your existing sprinkler valve controls when water enters the zone. It can continue controlling the converted drip zone, if it's compatible with the system and operates correctly.
Check available water pressure and flow
Most residential sprinkler systems operate at pressures higher than drip irrigation components require. Drip systems work effectively at low pressure. You will probably need a pressure regulator to reduce the pressure to an appropriate level.
Consider the area you're converting
A small flower bed may work well with an existing zone, but a large vegetable garden, or shrub border might require additional tubing, separate zones or a new valve.
Check the irrigation controller
Your existing sprinkler controller can run the converted zone. But you'll need to adjust its settings because drip irrigation requires longer watering cycles than sprinklers.
Important Note: If you want to keep your existing lawn sprinklers operating while adding a drip irrigation zone elsewhere, the drip system needs to have its own independently controlled valve and zone. Don’t just connect drip tubing to an active sprinkler line without considering pressure, flow, and scheduling.
Methods for Adding a Drip Zone
There are two main ways to add micro-irrigation to an existing automatic sprinkler system.
Method 1: Convert an Existing Spray Zone to Drip
If a zone currently waters only shrubs or flower beds, you can cap or remove the spray heads and attach a drip adapter and drip tubing to the existing riser. It's fast but only works if the entire zone is planting beds or you already have a spray zone running through flower beds, garden areas, or shrub lines. Never mix spray heads and drip on the same zone, because their flow rates and pressure needs are completely different.
Method 2: Add a New Valve and Dedicated Drip Zone
This is an excellent method. It is ideal when your existing sprinkler zones must remain active for turfgrass, and you need a completely independent, newly wired zone specifically for drip lines.
This approach requires installing a new solenoid valve on the manifold, adding low-flow regulation, running fresh wire to an open station on your smart controller, and laying drip lines from it. It's the simplest, most reliable approach and the one we'll focus on.
Essential Components You’ll Need for Adding a Drip Zone
Before you begin, gather all the necessary irrigation components. Each one has a specific job, and leaving out even a small part can affect how well the system performs.
Here are the main components you'll need.
- A drip irrigation filter: Typically, 150–200 mesh. This protects emitters from sand and debris.
- A pressure regulator: Most drip systems run best at about 25 PSI, while household and sprinkler lines often run 40-80 PSI.
- A fitting to connect to your line: A threaded adapter or poly adapter.
- 1/2" poly drip tubing: Your main supply line, which is also called the mainline.
- 1/4" distribution tubing: Connects the mainline to individual plants, containers, and smaller planting areas.
- An irrigation valve: A standard 3/4" or 1" valve that matches your existing manifold.
- 1/4-inch soaker dripline: Delivers water along a continuous row through built-in emitters.
- Emitters or emitter tubing: Drippers, pressure-compensating emitters, or inline drip line.
- Connectors, tees, elbows, and stakes to secure everything.
- A flush valve or end cap: Closes off the line and lets you flush debris.
- Waterproof wire connectors and irrigation wire for the new valve.
- Basic tools: a shovel or trenching tool, poly tubing cutters, a hole punch, PVC primer and cement (if working with PVC), and Teflon tape.
Tip: If that sounds like a lot of shopping, you can get a DripWorks Sprinkler to Drip Conversion Kits for a more convenient process. DripWorks offers complete kits and individual components that are designed to work together, which makes a sprinkler-to-drip conversion far less frustrating.
How to Add a Drip Zone to an Existing Sprinkler System
Once you have your products, prepare the existing irrigation system and install the new drip zone using this step-by-step process.
Plan Your Drip Zone
Start with a quick layout of the area you want to water. Mark the location of your plants, how far they are from your valve location, and any obstacles like walkways and driveways. Then consider the following.
- What you're watering. Identify all vegetables, shrubs, trees, and containers.
- Tubing and emitter requirements. How many emitters or feet of drip lines do you need.
- Available flow. A single 1/2" poly mainline can handle runs up to about 200 feet and flow up to roughly 240 gallons per hour (4 GPM). For larger systems, you'll want a second line or a larger supply line like ¾” poly for consistent delivery.
- Whether you have a free station on your timer. Check whether your irrigation timer has an unused station for the new drip zone. If every station is taken, you may need a timer expansion module, or you can convert an existing planting-bed zone instead.
Turn Off the Water Supply and Locate Your Manifold
Shut off the water supply to your sprinkler system and unplug your controller if you'll be working with wiring. Then find your valve box and manifold. It is the group of valves buried in a green plastic box in the yard. Open it up and take a look at the layout.
Take a picture of the valve arrangement before making any changes. This will give you a useful reference when reconnecting everything.
Install the New Valve
If you're adding a new zone, connect a new valve into the manifold using PVC fittings or compression fittings that match your current pipe size. If you're using PVC fittings, apply the appropriate primer and solvent cement, then allow the connections to cure according to the manufacturer's instructions before turning the water back on.
If you're converting an existing zone, simply identify which valve controls that planting bed and move on to the next installation step.
Pro tip: Use a valve with a built-in flow control feature if you can. It lets you fine-tune the water going to your drip zone.
Wire the Valve to Your Controller
Run irrigation wire from the new valve to your controller and connect the valve's wires to the common wire and a free station terminal. Make sure every wire connection is secured with waterproof connectors to prevent moisture from damaging the wiring or causing electrical issues inside the valve box.
Label the station on your controller as "Drip" so you don't forget.
Add the Filter and Pressure Regulator
This is the most important step that makes the whole conversion work. After the valve, install the following components in sequence.
- Filter (150–200 mesh)
- Pressure regulator (about 25 PSI)
- Adapter to connect the pipe assembly to your 1/2-inch polyethylene mainline tubing.
Point the arrows on the filter and regulator in the direction of water flow. Wrap threaded connections with Teflon tape and tighten by hand, then a quarter turn. Avoid over-tightening plastic fittings, as it can cause leaks.
A DripWorks FPR17 filter/pressure regulator combination is the best option for this installation. Its 30 PSI regulator reduces incoming pressure, while the filter helps prevent particles from entering the smaller drip tubing and emitter passages.
Lay Out Your Mainline Tubing
Unroll your 1/2" poly tubing and let it sit in the sun for 15–30 minutes. Warm tubing is flexible and much easier to work with. Then lay it out along your planting beds, following the plan you sketched.
- Keep the main line close to your plants.
- Use tees and elbows for branches and corners.
- Stake the tubing every 3-4 feet so it doesn't move.
- Avoid sharp kinks, which restrict water flow.
Add Emitters, Drip Line, and Distribution Tubing
Here comes the part that actually waters your plants. Depending on what you're growing, you have the following choices.
- For shrubs and perennials: Punch holes in the mainline and insert pressure-compensating emitters near the root zone, typically 1-2 per plant. Use a hole punch tool designed for poly tubing to create a clean opening that grips the fitting snugly.
- For trees: Use 2-4 emitters spaced around the drip line of the canopy and add more emitters as the tree grows.
- For vegetable rows: Install 1/4-inch soaker dripline along the planting rows. Its built-in emitters distribute water at regular intervals, making it useful for closely spaced crops.
- Containers and hanging baskets: Branch off with 1/4" tubing and use a single emitter per pot.
- For individual plants: Use 1/4-inch micro tubing and suitable emitters. Connect the micro tubing to the mainline using transfer barbs and run it to the base of each plant.
Flush, Test, and Fine-Tune
Before you close off the ends of the tubing, turn the water on and let it run for a minute or two to flush out dirt that got in during installation. Then cap the ends with flush valves or end caps.
Run the new zone through its full cycle and walk the line. Observe the entire system and check whether water reaches all the intended planting areas. You're looking for:
- Leaks at fittings
- Emitters that aren't dripping
- Tubing that's lifting off the ground
- Soggy spots that suggest too much flow
- Uneven water distribution across longer tubing runs.
Fix anything that looks off now, while the trenches are still open.
How to Set Up the Irrigation Controller for a Drip Zone
Once the installation is complete, update your irrigation controller settings to accommodate the new drip zone. You should not keep the old sprinkler schedule after converting it to drip irrigation. Sprinklers and drip systems apply water at different rates, so they rarely need the same watering schedule.
Here are some scheduling tips to consider.
- Start with shorter test cycles: Note how quickly water reaches the root zone before setting a permanent schedule.
- Water deeply: Allow moisture to penetrate deep into the soil rather than running the system for very short periods.
- Consider soil conditions: Sandy soil drains quickly. Clay soil absorbs water more slowly.
- Adjust watering seasonally: Your plants need less irrigation during cooler months and more during hot, dry weather.
- Check rainfall: Avoid unnecessary irrigation when rainfall has already supplied sufficient moisture.
If your existing controller supports independent station programming, you can manage the drip zone separately from your lawn sprinkler zones.
Drip Zone Maintenance Tips
Adding a drip zone is only one thing. You will need to regularly maintain your zone to prevent blockages, leaks and uneven watering. These few simple habits will keep your system running for years.
- Flush the lines at the start of each season by opening the end caps.
- Clean or replace the filter every few months, or whenever you notice reduced flow.
- Inspect emitters monthly during the growing season for clogs and pests. Critters sometimes chew tubing.
- Adjust for growth. As plants mature, add emitters or reposition them.
- Winterize the system: In freezing regions, drain or winterize exposed components and follow manufacturer instructions to prevent freeze damage.
Fall Drip Irrigation: How to Adjust Your Drip Watering System for Cooler Weather
Can I connect drip irrigation directly to a regular lawn sprinkler line without a pressure regulator?
No. Standard underground sprinkler zones operate between 40 and 80 PSI. Without a pressure regulator, high water pressure can blow drip fittings apart, burst poly tubing, and pop drippers out. Always use a 25 PSI or 30 PSI regulator.
Do I need to remove all sprinkler heads when converting a zone to drip irrigation?
You must convert or cap all sprinkler heads connected to the same valve if you want that zone to operate as drip irrigation. Leaving active sprinklers alongside drip emitters on the same zone can create incompatible watering schedules and uneven irrigation.
What is the best DripWorks kit for converting a sprinkler to drip irrigation?
The DripWorks 1/2-inch Sprinkler to Drip Conversion Kit (KCV2) is a useful option for garden beds and border plantings. It includes a filter/pressure regulator, mainline tubing, micro tubing, soaker dripline, and fittings. The 8-Way Conversion Kit (KCV1) is the best option for containers, raised beds, and multiple smaller planting areas.
The Bottom Line
Adding a drip irrigation zone to an existing sprinkler system delivers targeted hydration to your plant root zones. Drip irrigation improves plant health, suppresses weed germination, and reduces outdoor water consumption by 20% to 70%. The best thing is you don’t have to start from scratch. With the right connections, filtration, pressure regulation, and distribution tubing, you can create an efficient watering system for garden beds, shrubs, vegetables, and landscape plants. It's affordable, it's beginner-friendly, and it gives your thirsty plant beds the right water at the right pace.
For homeowners and landscapers looking for reliable components, DripWorks offers filter/regulator units, poly tubing, soaker dripline, micro tubing, and other irrigation accessories. Browse DripWorks drip irrigation kits and components to find everything you need in one place, and turn your sprinkler system into a smarter, more efficient watering machine.