
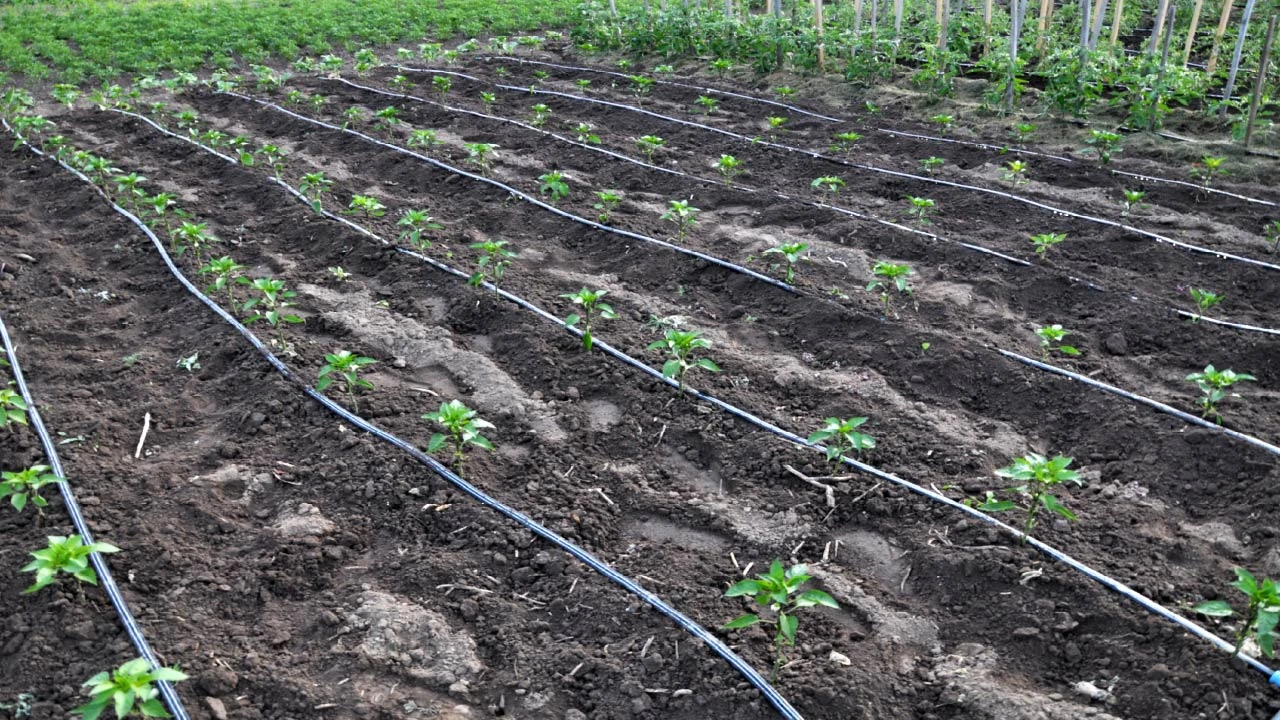
Drip Tape vs. Drip Lines
Nov 11th 2026
Drip Tape or Drip Lines? Choosing between drip tape and drip line can feel overwhelming. You want the right system for your crops, but the details and cost differences make it hard to decide. You've probably heard about drip tape's budget-friendly cost and perfect fit for straight garden rows. Or maybe you know drip lines for their impressive durability and ability to wind around curved landscapes. The truth is, both options have their benefits, and the right choice depends on how and where you plan to use them. What if you pick the wrong one? Choosing the wrong one will not ruin your season, but it can cost you money, time and harvests.
Drip tape is ideal for vegetable growers, market gardeners, and farmers who need to irrigate long rows of crops without spending a fortune. Drip lines offer more flexibility for landscape beds, raised gardens, shrubs, trees, containers, and permanent irrigation setups.
But which one makes more sense for your growing space? Is drip tape simply a cheaper version of drip tubing, or do the two work differently? Let's compare drip tape and drip lines, where each performs best, and how to incorporate them into an efficient drip irrigation system.
What Is Drip Tape?
Drip tape is a thin-walled, flat polyethylene irrigation tube that delivers water slowly and directly to plant roots. This flexible tube has small built-in emitters molded directly into the wall at regular intervals. When pressurized, it swells into a round tube and water seeps out of the emitter openings. When the water is off, it lies flat like a ribbon.
Drip tape is designed for long, straight rows and is especially popular for watering:
- Vegetable and row crops
- Annual plantings and seasonal crops
- Large fields where cost per foot matters
Key Features of Drip Tape
- Thin walls: commonly 4 to 15 mil thick
- Close emitter spacing: often 4, 8, 12, or 16 inches apart
- Low cost per foot: the biggest selling point
- Lightweight and easy to roll out: ideal for long rows
Thicker drip tape (around 10 to 15 mil) can last several seasons with proper care, especially under mulch or plastic. But it is still more delicate than thick-walled irrigation tubing.
Best Uses for Drip Tape
Drip tape is best suited for the following applications.
- Vegetable gardens and farms growing tomatoes, peppers, cucumbers, onions, and leafy greens.
- Market gardens with closely spaced crop rows.
- Strawberries and other row crops grown on plastic mulch.
- Large raised-bed or in-ground plots where you want uniform, tight watering.
- Seed germination zones, where close emitter spacing keeps the soil evenly moist.
What makes drip tape different?
Drip tape's lightweight design makes it affordable, easy to handle, and easy to roll out along long planting rows. However, this also means it needs more careful handling than thicker irrigation tubing. Sharp tools, excessive pressure, rodents, and rough installation can damage it.
DripWorks offers premium-quality Aqua-Traxx Azul drip tape in a range of thicknesses, including 6-mil to 15-mil options. You can also find different emitter spacings, flow rates, and roll lengths, with options ranging from 100 to 4,000 feet. This variety makes it easier for growers to find a suitable product based on their field size, crop layout, and irrigation needs.
What Is a Drip Line?
A drip line or drip irrigation line, is a round, thick-walled polyethylene tube that delivers water through built-in emitters or separately installed drippers. It looks like standard garden tubing, but with a built-in emitter every 9, 12, 18, or 24 inches. They come in different diameters, materials, emitter spacings, and flow rates.
Unlike thin drip tape, many drip lines are made from thicker polyethylene tubing. It feels much sturdier when you pick it up. This isn't something you change after one season. The heavy-duty construction allows it to withstand soil movement, rocks, and weather for 5-10 years.
Compared to drip tape, it is more durable and can handle higher pressures and a wider range of layouts.
- Drip lines are ideal for orchards, vineyards, perennial beds, and landscapes.
- They work well on slopes when you use a pressure-compensating (PC) drip line.
- They handle curves and contours better than thin-wall drip tape.
Key Features of Drip Line
- Thicker, rigid wall maintains its round shape and resists punctures, UV, and foot traffic.
- Pressure compensating options emitters release the same amount of water at the start and end of long runs.
- Longer lifespan can last 5 to 10+ years when properly installed and winterized.
- Easy to loop, curve, and route works around trees, shrubs, curved borders, and irregular beds.
However, not all drip lines are the same. Here are two common types of driplines used in drip irrigation systems.
1. Soaker dripline
A soaker dripline has small emitters already installed inside the tubing at fixed intervals. It is flexible enough to follow planting arrangements, run through raised beds, and wind around trees or shrubs.
DripWorks offers a versatile ¼ Soaker Dripline with emitters spaced every 6, 9, or 12 inches. This is the best choice for closely planted vegetables, flower beds, containers, and smaller garden spaces.
2. Emitter tubing
Emitter tubing is a larger-diameter irrigation tube with built-in emitters every 9, 12, 18, 24, or 36 inches. Some products feature pressure-compensating emitters, which help maintain a steady water flow along the tubing despite pressure differences along the line.
DripWorks' ½ Emitter Tubing is a good example. It comes in different emitter spacings and flow-rate options, giving you more flexibility when planning irrigation for larger gardens, landscape beds, orchards, and other permanent irrigation layouts.
Best Uses for Drip Line
- Perennial gardens and flower beds
- Raised vegetable beds.
- Home gardens, shrub borders, hedges, and container plants.
- Orchards, vineyards, and berry patches.
- Permanent raised beds and greenhouse benches.
- Slopes and uneven terrain, where pressure compensating (PC) emitters keep flow consistent.
For most permanent systems, drip line is the best choice when you want a long-lasting system with less risk of damage during installation and maintenance.
5 Common Drip Line Problems and How to Resolve Them
Drip Tape vs. Drip Lines: What's the Difference?
Both options use built-in emitters to deliver water close to plant roots. However, their construction and applications make them quite different. Let's explore the major differences in more detail.
Material and Wall Thickness
The most significant difference is their construction. Drip tape has thin walls that allow the tubing to flatten when it is not carrying water. This makes it lightweight and easy to transport, install and remove. However, the thinner material is more sensitive to punctures, crushing, and damage from sharp tools.
Drip lines have thicker walls and a more robust structure. They handle everyday garden conditions better, especially where irrigation tubing stays exposed or needs to withstand repeated handling.
Cost
Drip tape wins on price. However, the cheapest tubing isn't necessarily the most economical option over the long term. Drip tape generally costs less per foot upfront than heavier drip tubing. It works well for large growing areas where you may need hundreds or thousands of feet of irrigation material.
Drip lines may require a larger initial investment, but their durability can make them worthwhile for installations. If your plants stay in place for years, buying drip line once is almost always cheaper in the long run than buying tape repeatedly.
Durability and Lifespan
Drip tape is used for seasonal irrigation because it is economical and easy to replace. Its lifespan depends on wall thickness, water quality, installation, UV exposure, storage, and maintenance. Thin drip tape can be easily nicked by a hoe, chewed by a curious rodent, or cracked by UV after a season in the sun.
Drip lines are usually the better option when you want irrigation components that can remain installed for several seasons. Their thicker construction better resists everyday wear and tear. If you live where winters freeze, drain and store either product, or leave it carefully buried and blown out.
Emitter Spacing and Water Distribution
Drip tape and drip lines distribute water through pre-installed emitters, but the spacing and flow characteristics vary.
Drip tape is commonly available with emitters positioned at regular intervals, such as 6, 8, 12, or 18 inches, depending on the brand and product. These arrangements work well for closely planted crops where water needs to reach several plants along the same row.
For larger installations, 1/2-inch emitter tubing offers additional spacing and flow-rate choices.
For widely spaced shrubs or trees, use individual emitters or appropriately spaced emitter tubing.
Pressure Compensation and Run Length
Drip tape operates best at relatively low pressure within approximately 4–15 PSI. Applying too much pressure can stretch or damage the tape and cause leaks and connection failures.
Drip lines have different pressure requirements depending on their emitter design and tubing construction. Drip tape is great with longer runs but may struggle with uneven terrain. If you need to water a long row or a hillside, a pressure-compensating drip line can be a better option. It provides uniform flow along the line from the first emitter to the last, so every plant gets the same amount of water.
Installation and Maintenance
Drip tape is light and unrolls quickly. This feature makes installation quicker when you're covering a large vegetable garden or several crop rows. Connect it to a suitable mainline using compatible start fittings, lay it along the planting area and secure it with stakes where needed.
The drip line is stiffer but holds its position, can be staked and is easier to snake around obstacles. Drip lines offer more flexibility in garden design. Smaller tubing can follow curved beds, wind around shrubs, and fit into compact planting arrangements. But larger emitter tubing may need suitable connectors, cutting tools and fittings to accommodate corners and branching sections.
For either option, install a filter, use an appropriate pressure regulator, and flush the system before sealing the ends.
When Should You Use Drip Tape?
Drip tape is an excellent choice when your planting layout consists of long, straight rows. It is popular among vegetable growers because it delivers water along the entire crop row without requiring individual watering devices for every plant.
Here are some situations where drip tape makes sense.
- You are watering long, straight row crops or vegetable beds.
- You want the lowest cost per foot for large plantings.
- Most runs are flat and straight.
- You don't mind replacing the tape after a season or a few years.
- You are growing strawberries because they benefit from consistent moisture around their root zones.
- You are irrigating crops in greenhouses and high tunnels.
- You grow large quantities of vegetables in your home garden.
When Are Drip Lines the Better Choice?
Choose drip lines in the following situations.
- You are irrigating orchards, berries, or permanent beds.
- Your garden has raised garden beds. You can arrange smaller soaker driplines around vegetables, herbs, and flowers.
- You are watering container gardens because containers dry out faster than many in-ground planting areas.
- You need tubing that handles curves and slopes more easily.
- You want longer-lasting, more durable tubing.
- You prefer pressure-compensating emitters for uniform flow across elevation changes.
- You don't want to remove irrigation tubing at the end of every growing season.
Can You Use Drip Tape and Drip Lines in the Same Irrigation System?
Yes. In fact, combining different irrigation products is a more efficient way to water a garden or landscape with different planting areas.
If you have a landscape with a vegetable garden, raised beds, ornamental shrubs, and a small orchard, using one type of tubing may not be the right solution.
Instead, you should divide your irrigation system into separate zones:
- Vegetable rows: Use drip tape for long, straight planting rows.
- Raised beds: Install 1/4-inch Soaker Dripline to water closely planted vegetables and herbs.
- Shrub borders: Use 1/2-inch emitter tubing or suitable individual emitters.
- Fruit trees: Use appropriately sized dripline loops or multiple point-source emitters.
Installation Tips for Drip Tape and Drip Line
Follow these steps to create a well-designed layout.
- Measure your space and sketch your rows or beds.
- Install a filter and pressure regulator at the water source to ensure your tubing can last longer.
- Run the mainline to the edge of the growing area.
- Connect your drip tape or line with the right fitting.
- Flush the lines before closing the ends to clear debris.
- Test for leaks and uniform flow before planting or mulching.
- Set the timer. Water early in the morning for longer sessions that encourage deeper roots.
- Inspect the system regularly. Turn on the system and walk along the planting rows. Look for leaks, blocked emitters, disconnected fittings, and areas receiving too much or too little water.
The Bottom Line
Drip tape and drip lines both offer practical ways to improve irrigation efficiency. Drip tape is the budget-friendly, easy-to-install option for annual vegetables and row crops. Drip line is built for more demanding, long-term applications, like perennial gardens, landscape beds and areas where durability matters.
Still unsure whether your project needs drip tape, dripline, or emitter tubing? Our team is here to help. Share a few details about your crop, row lengths and water source, and we'll help you find the right products from our Drip Tape and Driplines collections.
At DripWorks, we carry a wide selection of drip tape, drip irrigation lines, soaker driplines, emitter tubing, filters, pressure regulators, fittings, and complete irrigation kits to help gardeners, growers, and landscapers build efficient watering systems. A little planning now means less water waste and healthier plants next season.