
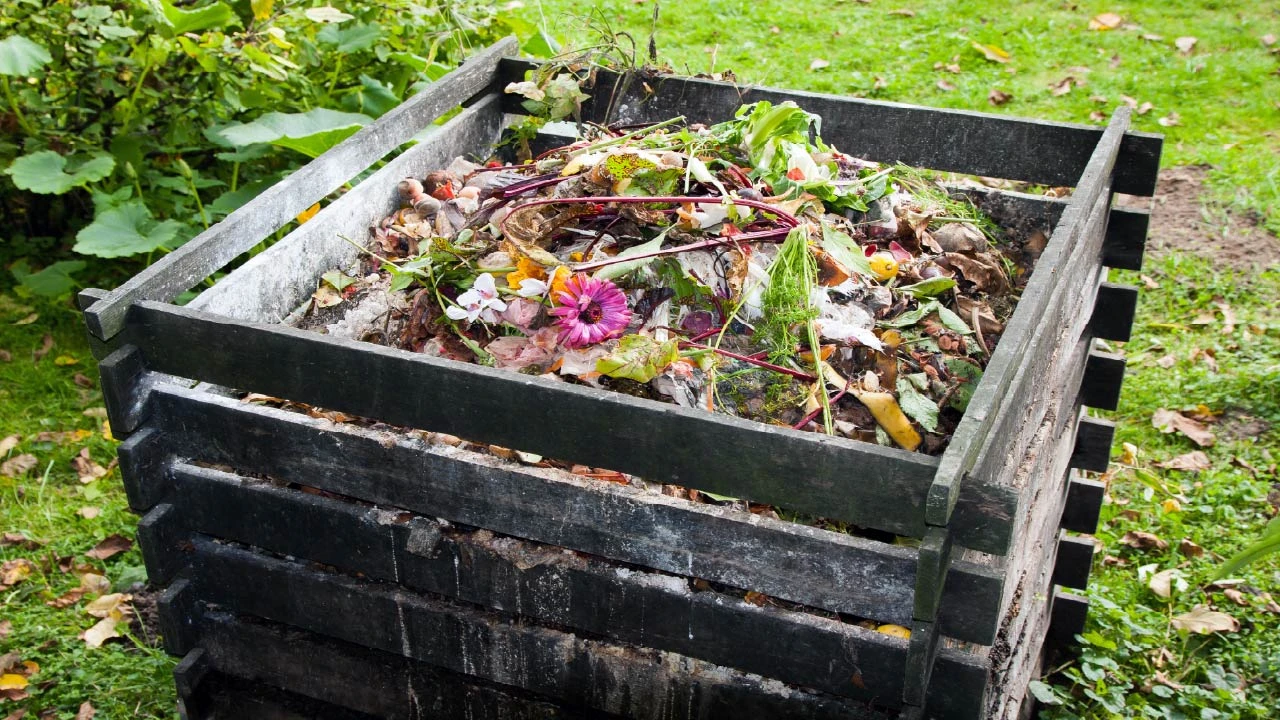
Fall Composting Guide: How to Compost Leaves and Garden Waste
Nov 18th 2026
Fall is the best time to start composting because the garden starts producing more waste than usual. Leaves, garden trimmings, spent plants and kitchen scraps are widely available. Leaves cover the lawn, vegetable plants begin to fade, flower stems dry out, and the last grass clippings of the season pile up. Composting is a simple way to put those fallen leaves and garden leftovers to work. Instead of throwing them away, you can turn them into dark, crumbly organic matter. Turning fallen leaves and garden waste into organic soil amendments saves money, improves garden soil, helps retain moisture, supports healthy plant growth, and builds healthier garden beds.
Want to know how to compost fall leaves and plant waste? This fall composting guide covers everything from collecting leaves to using finished compost in vegetable beds, container gardens and landscapes. So, let's transform your autumn leaves and plants into nutrient-rich soil.
Why Fall Is the Perfect Time to Start Composting Leaves and Garden Waste
Fall is a good time to compost because leaves are plentiful, temperatures stay mild enough for decomposition to continue, and you're clearing garden beds for winter. This gardening season provides a steady supply of materials that composting microorganisms can turn into useful soil amendments. Composting works year-round, but autumn offers ideal conditions to start or expand a compost pile for the following reasons.
Make Use of Fallen Leaves
During spring and summer, nitrogen-rich green materials like grass clippings and fresh kitchen scraps dominate. Fall balances it by providing an abundant supply of dry leaves, pine needles, and corn stalks.
A mature tree can drop a lot of foliage in just a few weeks. Dry leaves provide carbon, an essential ingredient in a balanced compost pile. They also help absorb excess moisture from wet grass clippings and kitchen scraps.
Shredded leaves work well because they break down faster than whole leaves and are less likely to form dense, airless mats.
Recycle Garden Waste Instead of Discarding It
After the last harvest, leaves, spent annuals, vegetable plants, and end-of-season trimmings all show up at once. They can contribute organic matter to your compost. Mix small, healthy trimmings with leaves to create a more balanced pile.
This approach also helps reduce the volume of waste material you need to move away. If your garden produces a large quantity of leaves every fall, composting can save storage space in waste bags and give you a useful soil amendment.
Prepare Your Soil for Spring
Finished compost improves soil structure and helps soil hold both water and nutrients. Sandy soil can benefit from better moisture retention, and compost can help heavy clay soil become more workable over time.
Remember that compost won't fix every soil problem overnight, but regular applications can make a noticeable difference over successive growing seasons.
Natural Thermal Insulation: Bigger Piles Hold Heat
Fall provides plenty of leaves and garden waste to build a larger compost pile. Bigger piles hold heat better naturally and help keep microbial activity active even when evening temperatures drop across North America.
What Can You Compost in Fall? Best Brown and Green Materials
The easiest way to build a successful compost pile is to sort your materials before adding them. Compost needs a mixture of carbon-rich materials, nitrogen-rich materials, moisture, and oxygen. Each plays a specific role.
Brown materials
Browns are carbon sources. They provide energy for the organisms that break down organic matter. Leaves are often the easiest brown material to collect in fall. Keep a separate pile or several bags of dry, shredded leaves near your composting area so you can add them whenever you introduce wet or nitrogen-rich material.
Good brown materials include:
- Dry fallen leaves from most common deciduous trees.
- Small twigs, woody pruning's and finely chopped branches.
- Small twigs, woody pruning's and finely chopped branches.
- Shredded, non-glossy cardboard.
- Plain brown paper bags and uncoated paper.
- Untreated wood chips in modest amounts.
Green materials
Green materials provide nitrogen, which composting microbes need to grow and reproduce. Despite the name, these materials do not all have to be green.
Suitable green materials include:
- Fresh grass clippings.
- Fruit and vegetable scraps.
- Coffee grounds and tea bags.
- Crushed eggshells.
- Healthy spent vegetable plants.
- Fresh garden trimmings and soft plant stems.
Grass clippings are useful in fall composting, but avoid adding a thick, wet layer on its own. It can mat together, restrict airflow, and create a sour smell. Mix it thoroughly with dry leaves instead.
Fall and Winter Gardens: Important Planning Tips
Fall Gardening Tools That Make Composting Easier
The right garden tools can make seasonal cleanup faster and less tiring, and they can speed up the composting process.
Consider keeping these gardening tools on hand:
- Garden rake: A sturdy rake helps you collect leaves from lawns, paths and planting beds.
- Leaf shredder or lawn mower: Breaks down leaves into smaller pieces.
- Garden fork: Turns compost and loosens compacted material.
- Pruners and loppers: Cut stems and small plant trimmings into manageable pieces.
- Wheelbarrow or garden cart: Moves leaves, compost, and other garden materials.
- Work gloves. Leaves hide thorns, spiders, and the occasional surprise. A durable pair of gloves will protect your hands from these elements.
- Compost thermometer: Optional but useful if you want to monitor the temperature of an actively managed pile.
You can also keep a container for collecting kitchen scraps and a supply of dry leaves nearby. That makes it easy to cover food scraps whenever you add them.
How to Compost Fall Leaves and Garden Waste
Here is a simple process for building a hot compost pile in autumn.
Pick the Right Composting Spot
Choose a spot you can reach year-round. A level area with good drainage, partial shade, and water access is ideal. Full sun dries the pile out quickly, while a deep shady spot may stay too wet.
Avoid placing the pile where rainwater regularly collects. Avoid placing it right against a wooden fence or house wall. Also, you should leave enough room to turn or mix the material without damaging nearby plants.
Gather or Shred Your Leaves
Use a garden rake to collect leaves from lawns, garden paths, and planting beds. Before collecting everything, check whether some leaves are better left where they fall.
Whole leaves, especially big ones like maple, tend to mat down into a slimy layer that blocks air. Shredding them solves the problem and makes them break down faster. Shredded leaves can decompose in a few months, while whole leaves may take a year or more.
Easy ways to shred leaves:
- Run a lawn mower over them a few times.
- Use a leaf shredder or string trimmer in a trash can.
- Use a mulching mower setting right on the lawn.
Select a Compost Bin or Pile
You can compost in an open pile, but a compost bin keeps things tidy, holds heat better, and discourages pests. Here are the common types of composting bins. Your choice depends on how much waste your garden produces and how much space you have.
Open compost pile
A low-cost option for larger gardens with plenty of leaves and garden trimmings. It is easy to add material, although the pile may need more attention to moisture and wildlife.
Enclosed compost bin
A practical choice for gardens where appearance, space, and keeping animals away from the contents matter. Choose a size that suits your fall cleanup.
A convenient option for smaller yards. It is easy to rotate and fairly pest resistant. However, its capacity may be limited when you have a large volume of leaves. So, it is better for kitchen scraps than for a mountain of leaves.
Build Your Compost Pile in Layers
Start with a few inches of coarse material such as small twigs or corn stalks on the bottom. This helps air flow underneath and allows excess moisture to drain. Then add layers of browns and greens.
- Four to six inches of shredded fall leaves.
- Two to three inches of greens such as kitchen scraps, grass clippings, coffee grounds, and spent plants.
- A light sprinkle of finished compost or garden soil to introduce active microbes.
- A light spray of water.
- Repeat this layering pattern until your pile is about three feet wide, three feet deep, and three feet tall. That size is big enough to generate heat but small enough to turn by hand.
When you build the pile, do these things.
- Break up compacted clumps.
- Add dry leaves whenever the mixture becomes too wet.
- Sprinkle water over very dry material.
- Cover fresh food scraps with several inches of leaves or other brown material.
- Keep the pile loose rather than packing it down.
Moisten as You Go
As you build each layer, sprinkle water evenly over the material. Your compost pile should feel like a wrung-out sponge, damp but not dripping. If you squeeze a handful and a few drops come out, you are right where you need to be.
Turn the Pile
Check your compost every week or two while temperatures are still warm. Turning can speed up decomposition by bringing oxygen into the pile and moving outer material toward the center.
If the pile smells sour or rotten, it may be too wet or lack oxygen. Add dry leaves and turn the material to improve airflow.
If the pile feels dusty and dry, add water gradually while mixing. If the pile is damp but decomposes slowly, shred the remaining large pieces and check the balance of green materials.
Lazy composter? Skip the turning and just wait longer. A pile that never turned is called a cold pile, and it works. It simply takes about a year or two instead of a few months.
Cover the Pile in Freezing Conditions
When cold weather arrives, cover your compost pile with a tarp or a layer of straw to help it hold warmth.
Uncovered outdoor piles can absorb too much water from winter rain and melting snow, which can slow or stop decomposition. If you use row covers to protect late greens, cover the compost bin on frosty nights.
How Long Does Fall Composting Take?
The exact answer depends on the materials you use, the size of the pieces, the pile's moisture, its temperature, and how often you turn it. A well-managed, active compost pile may produce usable compost in a few months. A cooler pile made mostly of whole leaves may take many months or longer. Fall composting continues into spring, so do not judge your pile by whether it finishes before winter.
Look for these signs that show your compost is ready:
- The material is crumbly and dark brown.
- Most original leaves and plant pieces are no longer recognizable.
- It smells earthy, not sour or rotten.
- The pile no longer heats up significantly after being mixed.
If you can still identify lots of fresh leaves, stems, or food scraps, let the material decompose longer. Immature compost can interfere with plant growth, particularly if you mix it heavily into the root zone.
What Not to Add in Fall Compost
Not every garden leftover belongs in a backyard compost pile. Some materials attract pests, contain unwanted chemicals, or may carry diseases and persistent weed seeds.
Avoid adding these materials.
- Meat, fish, bones, dairy products, and greasy foods.
- Pet waste and cat litter.
- Diseased or heavily pest-infested plants.
- Weeds carrying mature seeds or aggressive invasive weeds.
- Grass clippings treated with herbicides.
- Painted or treated wood.
- Glossy paper, plastic, and produce stickers.
How to Use Finished Compost in Your Garden
Once the compost has matured, you can use it in many parts of your landscape. Good compost is dark, crumbly, and earthy, and you should no longer recognize what went into it. If the pile still contains lots of fresh leaves or heats up significantly after turning, give it more time before applying it around plants.
Here is how to use the finished compost in your garden.
- Top-dress your garden beds. Spread one to two inches of compost over vegetable beds in fall or spring. There's no need to till it in. Earthworms and soil microbes will pull nutrients down into the root zone.
- Feed perennials and shrubs. Apply a layer around the base. Keep it a couple of inches from stems and trunks.
- Mix it into planting holes. Mix a handful of mature compost into individual planting holes when setting out new trees, shrubs, and summer crops like tomatoes, peppers, and eggplants to provide a steady release of nutrients.
- Amend new beds. Work two to three inches into the top six inches of soil before planting.
- Refresh container soil. Blend about one part compost with three parts potting mix.
Do fallen leaves need to be shredded before composting?
You can add whole leaves to your compost pile, but smaller pieces break down more easily and won't form dense layers that block airflow. If you have whole leaves, mix them with other materials and monitor the pile for compaction.
The Bottom Line
Fall composting is the cheapest and most rewarding thing you can do for your garden. It can turn seasonal yard cleanup into an investment in your next year's garden. Fallen leaves provide carbon, garden trimmings and grass clippings supply nitrogen, and moisture and airflow help the materials break down. With a little effort now, a good compost bin, a few quality gardening tools, and a pile of leaves, you will have a bounty of dark, rich soil by spring.
As you prepare your garden for colder weather, take care of other essential tasks too. Keep gardening tools in good condition, review your garden drip irrigation system, winterize your garden, and use row covers to protect crops from light frost.