
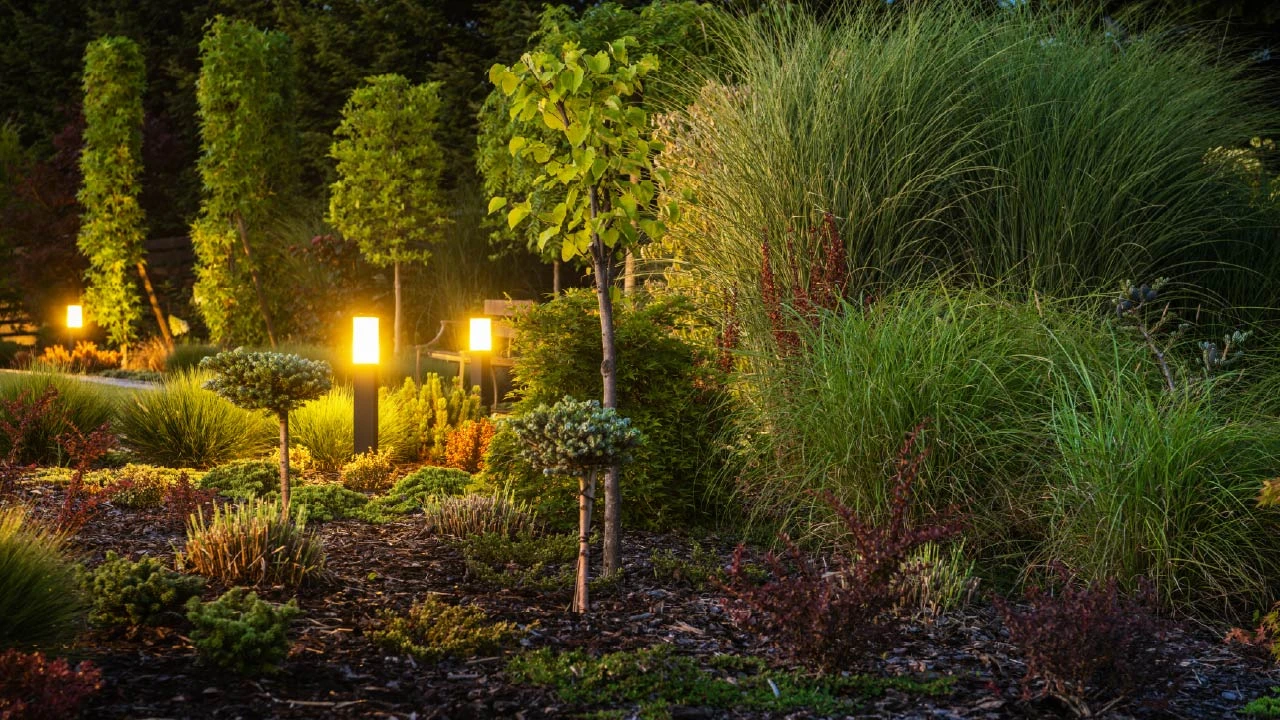
Layered Landscape Lighting Design Tips for Your Yard
Oct 28th 2026
Layered lighting is one of the best ways to achieve a stunning outdoor ambiance. When you want to create a captivating outdoor space that reflects your unique style and personality, landscape lighting plays a crucial role. However, the secret to rich, dramatic, and inviting outdoor spaces is what landscape professionals call layered landscape lighting design.
Layered lighting uses different types, intensities, positions, and heights of light to create depth instead of illuminating everything equally. Some lights guide movement. Some highlight plants, brighten up entertaining areas, wash walls with soft light, or add a subtle glow under trees and structures. That's why the most stunning gardens at night aren't the brightest, but the most thoughtfully layered.
What Is Layered Landscape Lighting?
Layered landscape lighting is the design approach that combines several types of light at different heights, intensities, and angles to create depth, mood, and function. Instead of using one bright source, you stack multiple soft ones.
Interior designers use this method indoors all the time. A great living room doesn't rely on a single ceiling fixture. It has lamps, sconces, and accent lights, each playing a role. Your yard deserves the same treatment.
A layered lighting design usually includes these layers.
- Ambient light: Gives the soft, general glow that lets you see and move comfortably.
- Task light: Focused light where you do things like grilling, climbing steps, or unlocking the door.
- Accent light: Highlights the drama, meaning trees, architecture, water, and textures you want to show off
- Path and step lighting: Offers navigation and safety.
- Architectural lighting: Brighten up walls, columns, fences, and structures.
- Downlighting: from trees or structures.
- Uplighting: from the ground toward vertical features.
- Silhouette and shadow lighting: for dramatic visual effects.
The goal isn't to use every technique in every yard. Combine the right techniques so the landscape has depth, hierarchy, contrast, and movement after dark.
A small backyard might need only three or four layers. However, a large landscape could have several overlapping lighting zones. When these layers overlap, your eye travels through the landscape instead of getting stuck on one spot. That movement is what makes a yard feel bigger and more inviting.
15 Outdoor Lighting Ideas that are Easy and Quick to Install
The Four Key Layers of a Great Landscape Lighting Design
Think of your yard as a stage with four lighting layers. You don't need all of them everywhere, but the best landscapes use most of them somewhere.
Layer 1: The Path and Safety Layer
The safety layer is more than simply making walkways brighter. Its goal is to help people move around without tripping. It should quietly reveal the landscape's changes in the landscape's elevation, edges, turns, and transitions.
The best safety lighting often becomes almost invisible once it is installed. People notice the comfortable and clearly defined path instead of a collection of fixtures.
Techniques and Ideas
- Path lights with downward-facing shades create soft pools of light on walkways. Stagger fixtures on alternating sides about 6 to 8 feet apart instead of placing them in a rigid straight line.
- Step lights or riser lights installed under stair treads or into retaining walls put light right where feet land.
- Hardscape lights tucked under a patio or seat wall with a subtle glow that also defines the space.
- In-ground well lights along driveway edges keep cars and guests oriented.
Pro tip: If you can clearly see the fixture itself from across the yard, it's either too bright or poorly placed. The goal is to see the light, not the lamp.
Layer 2: The Ambient Layer: The Soft Background Glow
Ambient light is what makes a space feel like a room rather than a dark void. It's gentle, wide and low intensity. Ambient lighting provides the soft illumination that makes an outdoor area comfortable. It doesn't need to be the brightest layer.
For a patio, ambient light will come from fixtures mounted under a pergola, subtle wall lighting, overhead lighting, or carefully positioned fixtures around the perimeter.
Techniques and Ideas
- Moonlighting: Install a fixture high in a mature tree and aim it downward through the branches. The light filters through the leaves and casts natural, moon-like shadows on the lawn and patio. It's the closest thing to magic in landscape lighting.
- Downlighting from eaves and pergolas: Soft, warm fixtures under roof overhangs or on pergola beams gently wash seating areas.
- String lights: Hanging bistro lights add cozy ambient light and a sense of ceiling over open spaces.
- Wall washing: A fence, privacy hedge, or stone wall lit softly becomes a glowing backdrop that makes the whole yard feel enclosed and intimate.
Layer 3: The Task Layer
Task lighting is bright enough to comfortably perform an activity without creating harsh glare or shining directly into people's eyes. Task lighting is important for outdoor kitchens, dining spaces, work areas, and entertainment zones.
A beautifully designed patio can still be impractical when someone is trying to prepare food under a dim grill hood or carry plates through a dark corner.
Techniques and Ideas
- Grill and outdoor kitchen lighting: A small, directional light aimed at the cooking surface, not at the cook's face. It saves you from chopping and flipping burgers by phone flashlight.
- Entry door lighting: Install wall sconces on either side of the door or use a well-positioned downlight to illuminate the entrance, house number, door hardware and nearby steps.
- Garage and driveway lighting: Use motion-activated or dusk-to-dawn fixtures that switch on when needed without keeping the entire area brightly lit all night.
- Outdoor dining or homework tables: A soft overhead light with a warm tone and a dimmer is best.
Layer 4: The Accent Layer
This is the fun part. Accent lighting turns ordinary features of your landscape into focal points and lets you paint with light. Rather than illuminating an entire garden bed, choose individual features that deserve attention.
A mature Japanese maple, ornamental grass, flowering tree, large boulder, sculpture, fountain, or unusual shrub can become a nighttime focal point with an accent layer. Pick the plants that have something interesting to say at night.
Accent Techniques
- Uplighting: Place a light at the base of a tree, column or tall shrub and move its focus upward. It highlights structure, bark and canopy. Keep fixtures 1 to 3 feet from the trunk and use a narrower beam for skinny trees and a wider one for broad canopies.
- Grazing: Position a light close to a textured surface, like stone, brick, or siding, and aim it upward at a shallow angle. The light rakes across the surface and exaggerates every texture. It looks amazing on stone chimneys.
- Spotlighting: A tight beam on a sculpture, specimen shrub, flagpole, or fountain makes it the clear star of the scene.
- Silhouetting: Light a wall or fence behind a plant. You get a dramatic dark outline. Ornamental grasses, Japanese maples, and agave are perfect for this idea.
- Shadowing: This is the reverse. Place a light in front of a plant and aim it at a wall behind it, so the plant casts a big, artistic shadow on the surface.
- Cross-lighting: Light a large tree or tall feature from two or more angles to avoid flat, one-sided shadows and to add fullness.
Layered Lighting Ideas for Different Parts of Your Yard
Here are different layered lighting ideas for different landscape styles.
The Front Yard and Entry
- Layer 1: Staggered path lights leading to the door
- Layer 2: Soft wash on the front using wide-beam fixtures
- Layer 3: Entry sconces or a downlight
- Layer 4: Uplight on a front yard tree or a grazing effect on a stone column
The Backyard Patio
- Layer 1: Step and wall lights
- Layer 2: LED string lights or pergola downlights on a dimmer
- Layer 3: A task light over the grill
- Layer 4: Uplight privacy trees around the edges to visually "expand" the space
Garden Beds and Planting Areas
- Combine low path lights for structure with spotlights on specimen plants.
- Try silhouetting ornamental grasses against a fence.
- Add a moonlighting fixture from a nearby tree for a natural look.
Pools and Water Features
- Use underwater lights in fountains and ponds.
- You can wash surrounding walls softly, so the water reflects a glow.
- Keep the deck lighting minimal so it doesn't compete with the pool.
Driveways and Side Yards
- Try using motion sensor lights for security without constant glare.
- Add low bollards or in-ground lights to define edges.
- Light gates and side entrances so no path is left in total darkness.
Tips to Plan Your Layered Lighting Design Step by Step
Now that you understand the different layers of lighting, let's explore steps to design a cohesive, captivating outdoor lighting scheme. You only need a flashlight, a notebook, and some patience to plan a great design.
Do a Nighttime Stroll
Wait until the sun goes down, turn off your existing outdoor lights, and walk around the property with a flashlight.
Note where you naturally look, where you feel unsafe and which features you will love. Take photos of the house from the street and from inside looking out. Windows are part of your view, and you'll be looking at your yard from indoors more than you think.
Create a List
Pick 3 to 5 features that deserve the spotlight. It can be a specimen tree, an architectural corner, a stone wall, and a water feature. Resist the urge to light everything. When every tree, shrub, wall and pathway receives equal attention, the landscape loses contrast and nothing stands out.
Plan Your Lighting in Zones
Divide your landscape into areas like the front entry, driveway, side yard, patio, garden beds and back lawn. Assign each zone at least two layers. Zoning gives you much greater control.
Choose your Fixtures and Color Temperature
Color temperature can completely change the mood of a landscape. For residential landscape lighting, warmer lights are commonly used to create a comfortable, welcoming appearance. For a natural, welcoming look, stay in the 2700K to 3000K range, which is warm white.
Cooler, bluish light at 4000K and above temperature can make a space feel stark and it fights with the warm tones of foliage and brick. Choose a narrow beam of roughly 15 to 25 degrees for tall, slender features such as tree trunks or columns. Wider beams of 60 degrees or more work better for broad trees, walls, planting beds, and other expansive surfaces.
Choose Low-Voltage LED Systems
For most homes, 12-volt low-voltage lighting offers a practical balance of safety, efficiency, and flexibility. Compared with line-voltage systems, low-voltage setups are generally easier to install and modify as the landscape changes. LED fixtures last for years and save electricity.
Test the Design Before You Trench
Don't permanently install every fixture on the first attempt. Lay out fixtures on the ground, connect them temporarily and check the effect at night.
Move a spotlight several inches or feet and watch how the shadow changes. Change the beam direction. Try a different fixture position. Step back 20 or 30 feet and look again.
A lighting design can look completely different from the perspective of someone sitting on a patio compared with someone standing beside the fixture. This is the most important step every pro takes when installing landscape lighting.
5 DIY Outdoor Lighting Ideas That Will Completely Transform Your Space
The Bottom Line
Layered lighting creates a visually stunning and functional outdoor space and makes an established garden look completely different at night. You just need to plan your design carefully, choose the right fixtures from a reputable brand, and consider the interplay of light and shadow to get the best results. The best landscape lighting highlights what you love, hides what you don't, keeps everyone safe, and turns your outdoor space into a magical place you want to stay.
Start small. Layer one thing at a time: safety first, then ambient, then the accent that makes your yard dramatic. You're not simply adding light to the landscape. You're designing how the landscape is experienced after dark. With these tips in mind, you're well on your way to illuminating your outdoor space in style.